This is some sample text.
Learn More
Uncategorized

Shopping Fun

My iPhone has been busy lately.  Snapping pics of all sorts of things I’m seeing that would be fun for the house.  Like I mentioned I’m trying to take my time decorating.  I don’t want to buy stuff just to fill the house up.  I want to buy things I really love and will use.  So I’ve been doing a lot of “possibility shopping” as I like to call it.  :)  Finding things that may or may not work.  Considering all sorts of fun options!  Here are a few things I’ve seen and loved that I thought you might like too..
Oh be still my heart.  The Container Store.  I can’t explain the giddiness that pulses through me as I walk these isles.  Pick your bin.  Any bin!  Works of art.  :)  
LOVED these blue/green office products.  I seriously spent 10 minutes trying to figure out where I could make them work in my house.  I don’t need them.  But I wanted to need them so badly.  :)
 How much fun is this wall of colorful chairs!?  Crate and Barrel.  Such a happy wall.  

 I finally picked out address numbers for the house.  It’s been on my to-do list for I don’t know… a year?  Loved the style/finish of these sandcast numbers.  They work perfectly with the outside of our home.

 Not so sure about these???
 Or these.  
A little scary. 

This perfect for me table I found at Home Goods.  Fell in love with it.  Bought it.  Brought it home.  And then returned it.  :(  It was just too small for where I wanted to put it.  Several places I wanted to put it.  Then I tried to convince Kenny that we needed to keep it in our bedroom even though the color clashed with our paint.  We can re-paint, right I asked?  No he answered.  (Probably should have waited until we’ve been in the house at least a year before I hit him with that one.  Live and learn.)  :)

 Hard for me to pass up a good mason jar.  
You can never have too many in my book.  
Or in my cupboard.  

Spring time in Pottery Barn!
 Speaking of warmer weather, Target has really fun outdoor chairs!

 And colorful graphic place mats.  

 And these darling poufs! 

 Considering this Welcome mat for the front door but I need to look around a bit more. 

And yellow Nate Berkus drawer organizers!  
Because I wanted to end on a sunny note.
:)
Happy Monday! 
xoxo, Erin
Organization

Headband Organization

Popping in to share how I’m organizing my girls’ headbands today!  I have been prioritizing their bathroom this week and almost have things completely organized.  Such a nice feeling since it has been a mess since we moved in!  
In my girls’ bathroom in our previous home I hung all of their hair bows on ribbons.

I just looped the headbands through the top large ribbon.  Worked great.  
Until our headband collection grew so much it no longer fit.  
In large part due to a certain someone who is as obsessed with headbands as she is mom’s shoes.  :)

In my girls’ new bathroom we have plenty of drawer/storage space.  Such a change from their last bathroom!  So for now (until we find a different way to utilize all of these drawers) I have the luxury of using an entire drawer for headbands. 
I found this wire basket from The Container Store and knew it would be a perfect solution for us.    

I could have just tossed them all inside the basket.  That works fine except it’s harder to see what your options are at a glance.  Since we are usually rushing in the mornings before school starts, I decided to line them up on the sides of the basket.  Now we can easily see them all and  there’s no wasted time rummaging through the basket to find that oh so perfect accessory.  :)  Those minutes in the morning add up!  Streamlined systems = calmer mornings.

Plenty of room for all of the flowers/frilly headband stuff on the inside.  

And on the outside of the basket some of the smaller headbands actually stick through the wire which holds them in place.  But even the big headbands that don’t stick through stay in place.  When I first placed them like this I thought if they all start falling off the basket this will drive me nuts.  But they don’t!  The wire basket is a great solution.

So behold – the headband drawer.  Girls know how to quickly find what headband they want to wear and where to put them back at the end of the day.  
And there is now peace in the land.  
Or at least in the girls’ bathroom.    
:) 

xoxo, Erin
Home Decor

Front Entry

Sharing a few pics of our front entry today!  When you walk in our front door you see into our formal living room and then out into the backyard.  Our entry is a simple square so when we were in the planning stage we decided it would be fun to do something different with the floor so that it stood out a bit more.
Here is our original sketch of the entry floor plan.  Most of the floors throughout our house are wood so we decided to keep some wood in a criss cross pattern and put marble tile in the squares.  I was a little nervous at first that this would look too busy and I kept going back and forth about whether or not I should keep this pattern or just leave the entry simple with only hardwood, but I ultimately decided to mix it up and go with the pattern.  I’m so glad I did!  I really like how it turned out.
Here is a pic I snapped with my phone when they had just laid the hard wood.  This took a LONG time for my hardwood guy to make all the cuts exactly perfect.  He was all about attention to detail – the two of us got along famously.  :)  He did such a great job lining everything up!

And here’s the floor all finished with the marble!  I remember the morning I chose which piece of marble should go in each square/triangle.  We came so close to not having enough marble to finish it all and I was stressed because each batch of marble is so unique that I would have had to order a whole new batch if I didn’t have enough.  Luckily we had just enough to finish the entry!

A pic I snapped with my phone from the upstairs after the wood was finished.
 And here is what it looks like from above today!  Still love that orb light.  :)

A few more pics of the entry…

This picture I took standing in our formal living room so you can see how the pattern is just on the entry way floor.

I was going to get shots from a few more angles but a certain someone crashed my photo shoot.  No more pictures mom!  Time to pay attention to me!  
So that’s a wrap on the entry post.
:)
xoxo, Erin
Uncategorized

Cleaning out hair and make-up brushes

Happy March everyone!  So excited for this month.  It’s always a favorite of mine.  :)  We had a cozy weekend full of non-stop RAIN.  I loved it.  Except for the wind!  Friday the wind blew so hard that trees were falling right and left.  One of our front yard trees fell but we luckily saved it!
I know.  This is hardly extreme weather for most of you, but it sure mixed things up around here.  :)
Rain always puts me in the mood to organize!  I got a great jump start on a few projects and did a little spring cleaning.  Because I’m ready for spring!  I’ve been organizing a few things in my new bathroom and decided it was time to clean out all of our brushes again.  
How often do you clean your hair and make-up brushes?  A couple of years ago I was flipping through a magazine and came a crossed an article that said you should wash your brushes out every two months.  I’ll be honest – that doesn’t happen around here!  But ever since I first posted about this I have been better about washing them out whenever they start looking like they need it. 

(Picture from my previous house)  
It’s actually such a quick/easy thing to do.  To wash your hair brushes, first comb out any excess hair with a hair pick or comb.  Then just fill your sink with hot water and add little soap or shampoo and soak your brushes for 10 -15 minutes.  After they’ve soaked a few minutes I like to swish them back and forth several times.  Then rinse them off and set them on a paper towel to dry.  
With my make-up brushes I just wet the brush, rub a little shampoo into it, and then rinse.  They clean up beautifully.  Nothing like starting the day with clean hair and make-up brushes!  And in an organized bathroom drawer?  Even better.  :)
Enjoy your Monday everyone!
xoxo, Erin
Home Decor

Family Room Decor Update!

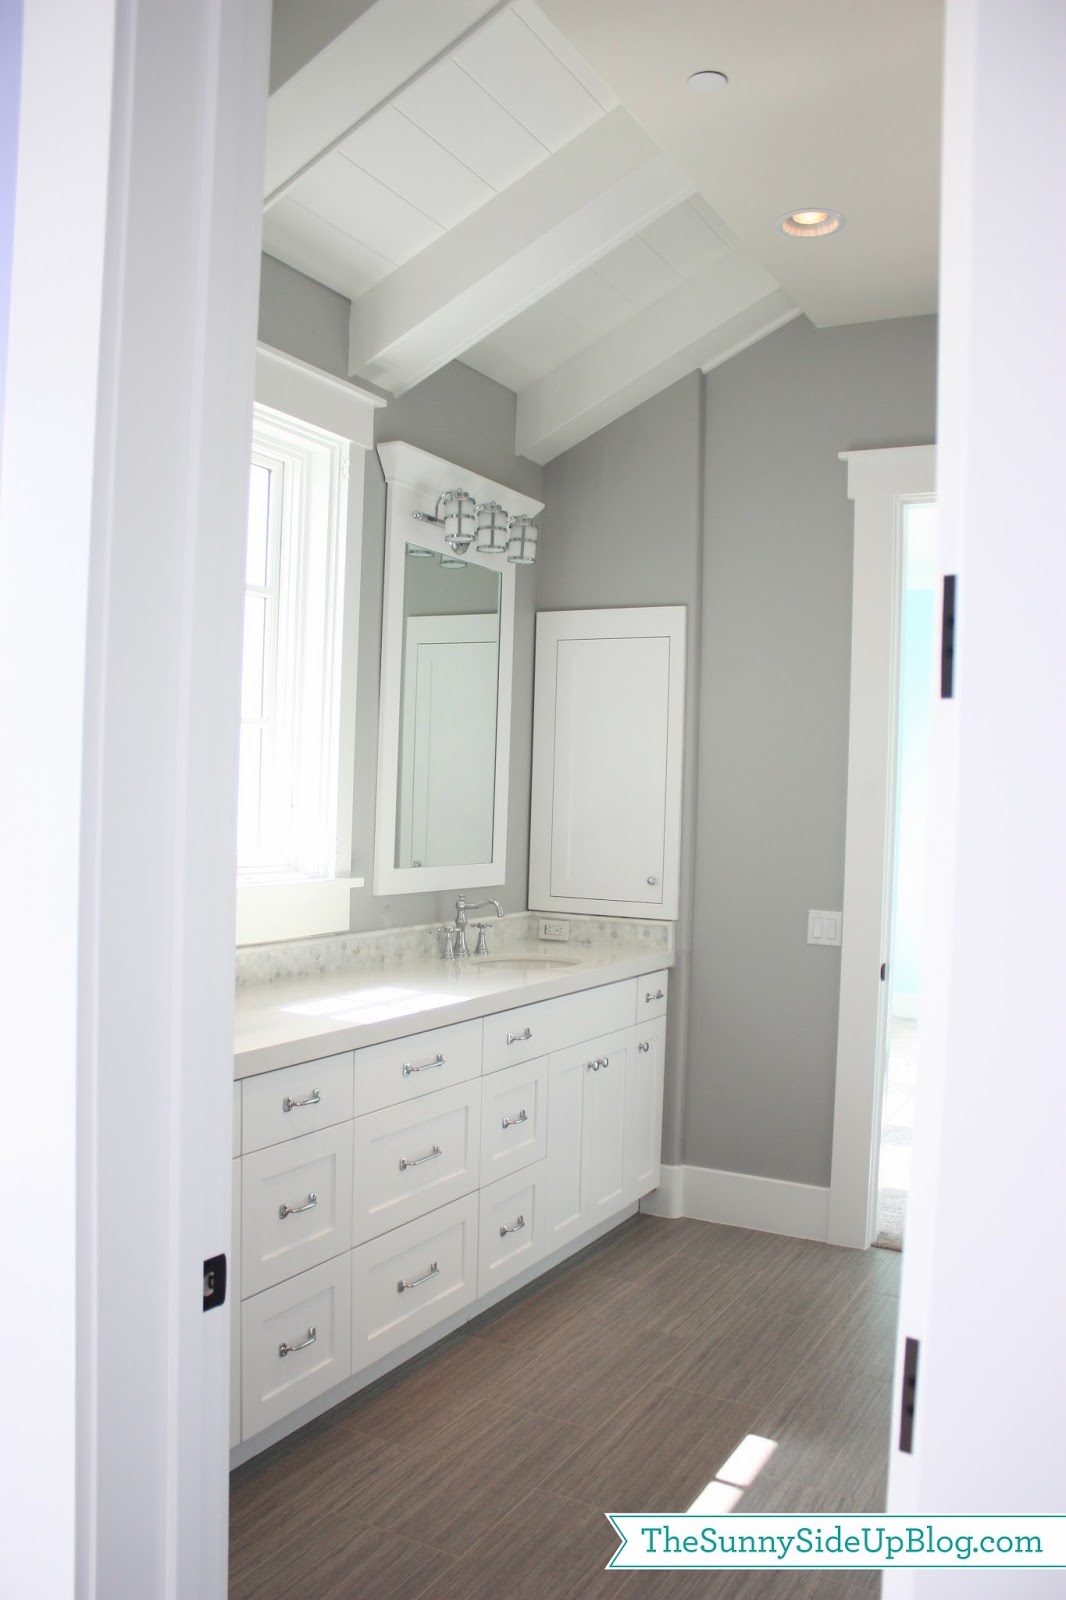
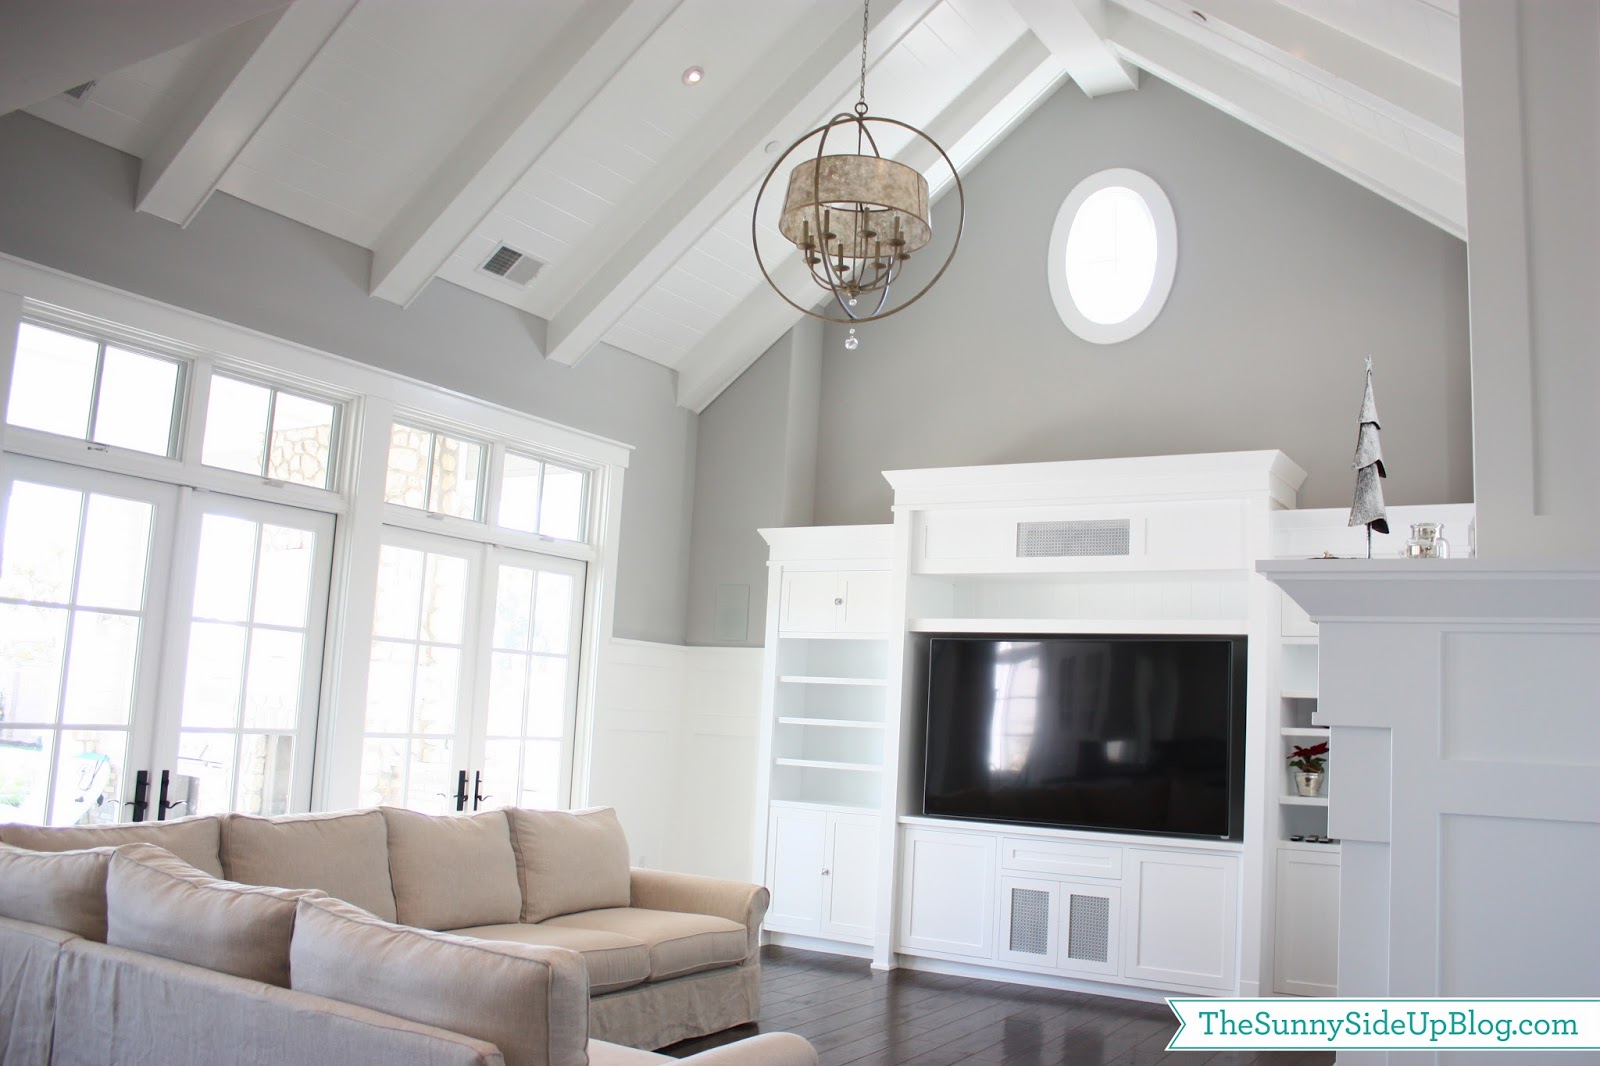
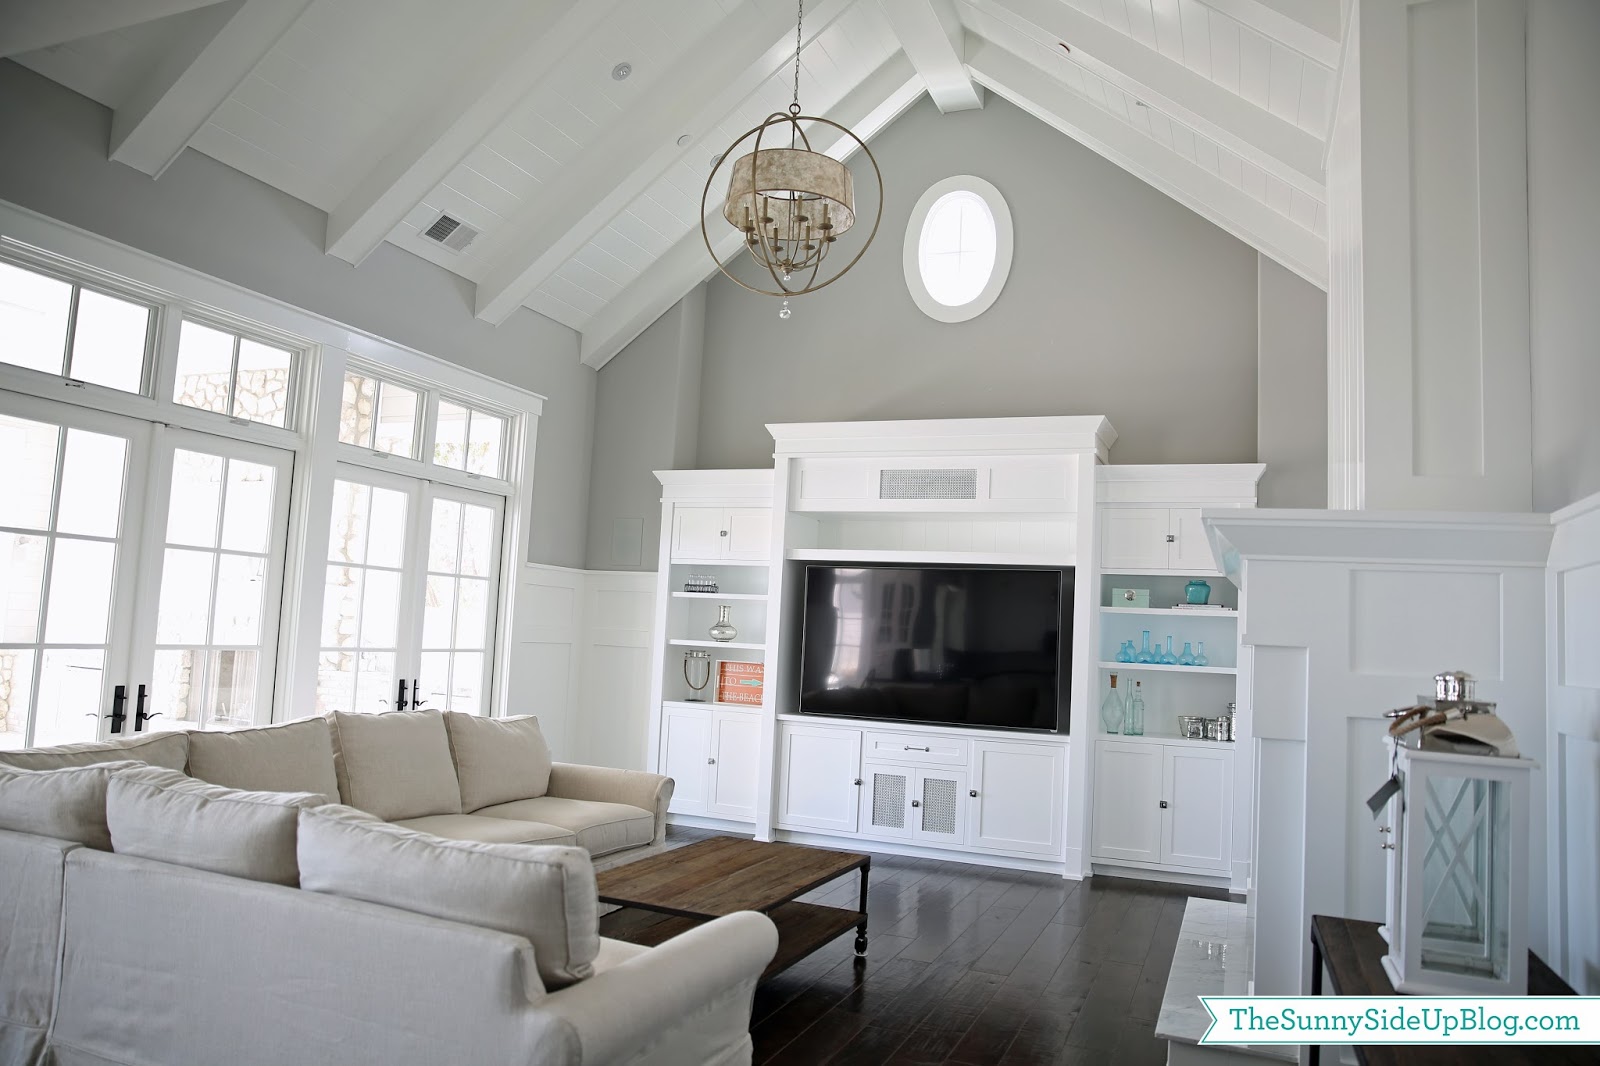
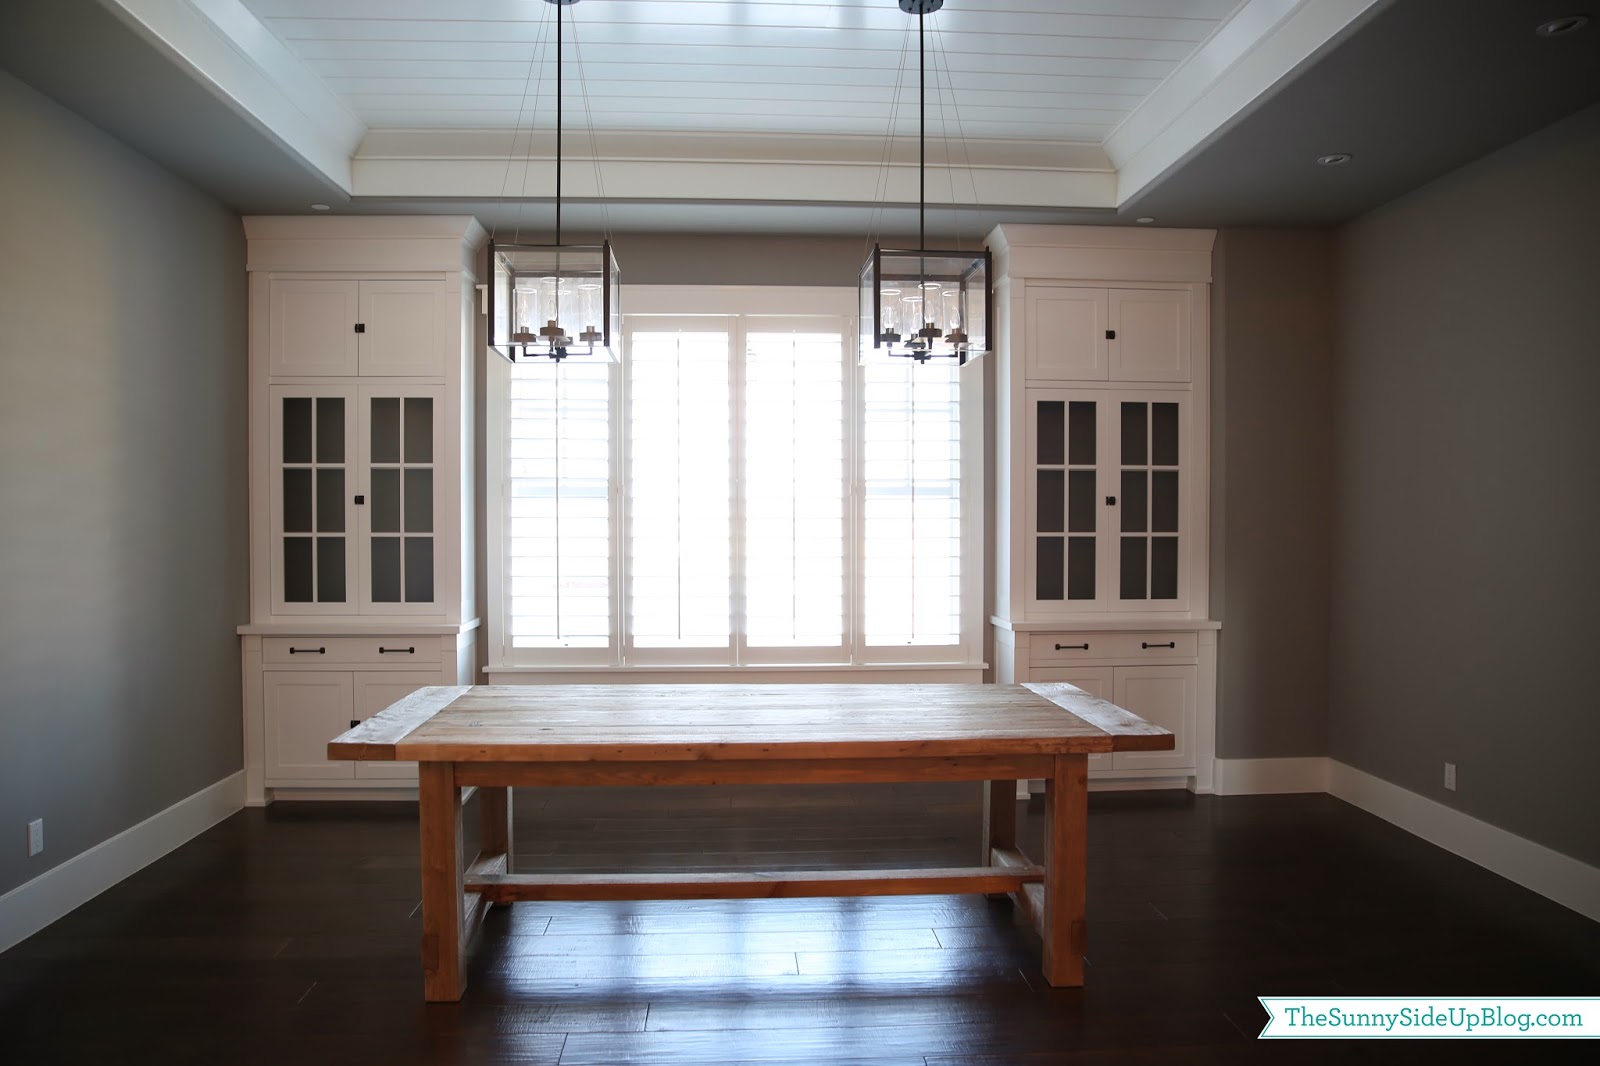
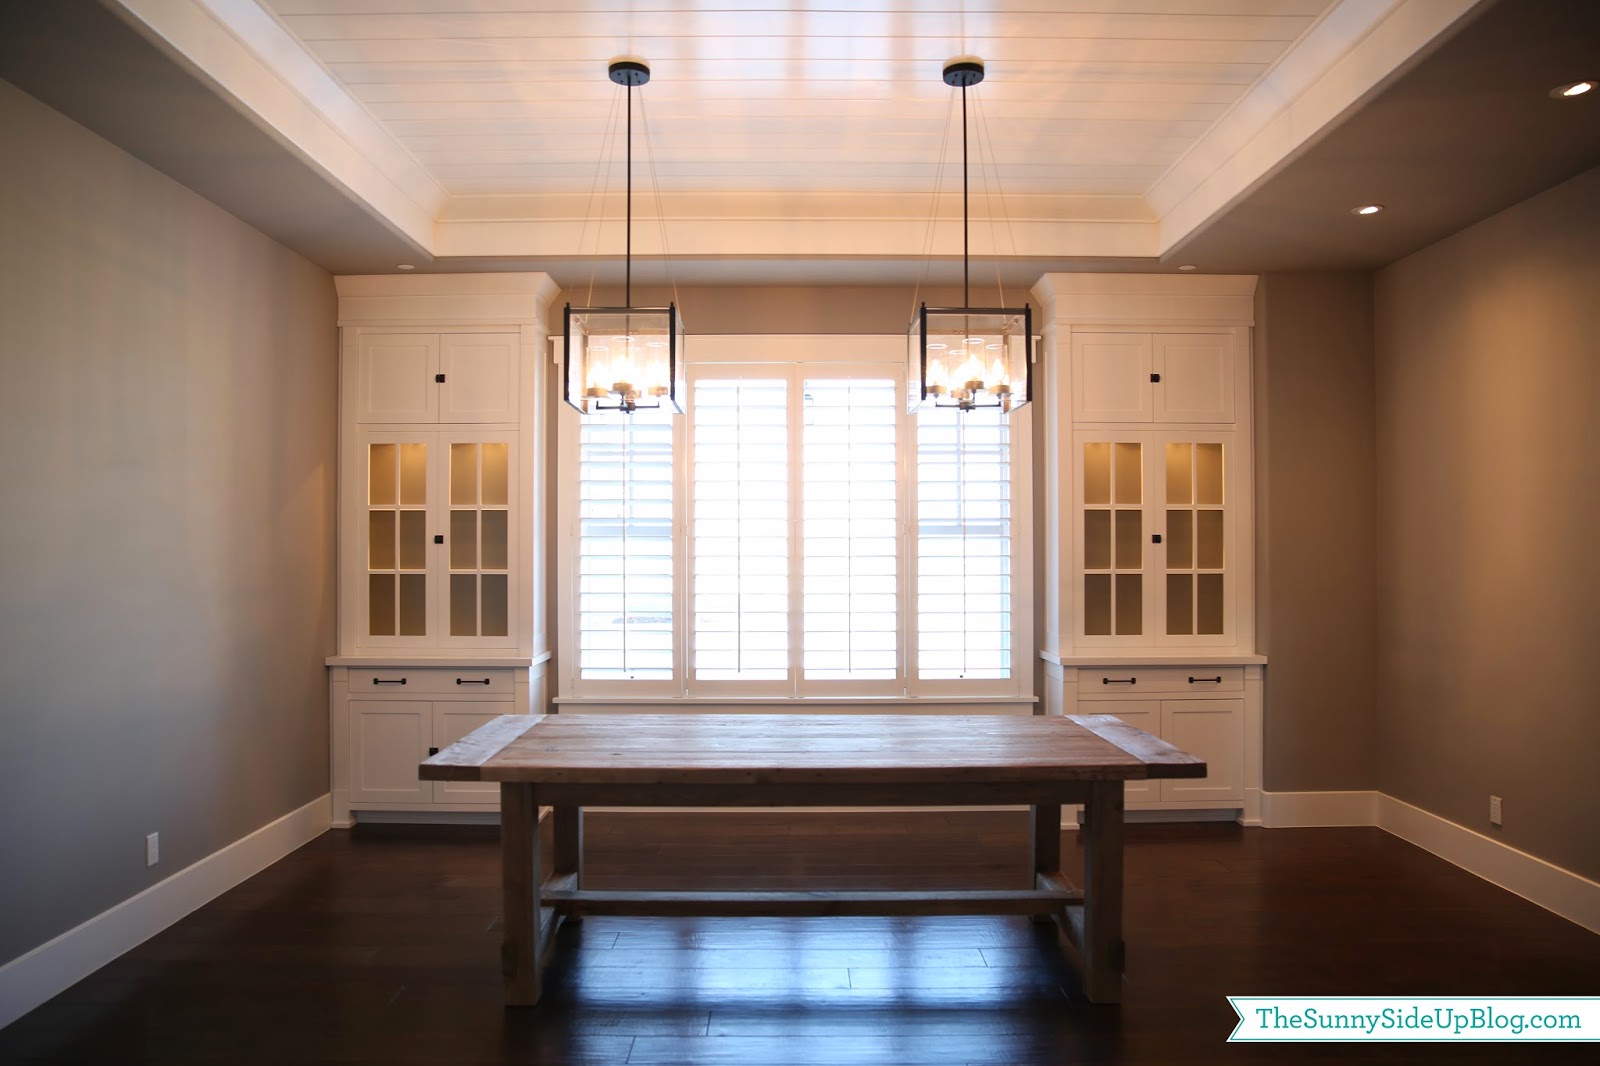
YEA!  Friday is here.  Best day of the week.  Sometimes the anticipation of the weekend is even better than the actual weekend.  Right?  I’m so excited to share how our family room is coming along with all of you!  I have slowly been chipping away at it. I have to tell you I am no where NEAR done decorating this space so I know it looks very bland at the moment.  We are working on getting the big pieces of furniture in place and then the fun, colorful accessorizing can happen (most excited for that part!).  
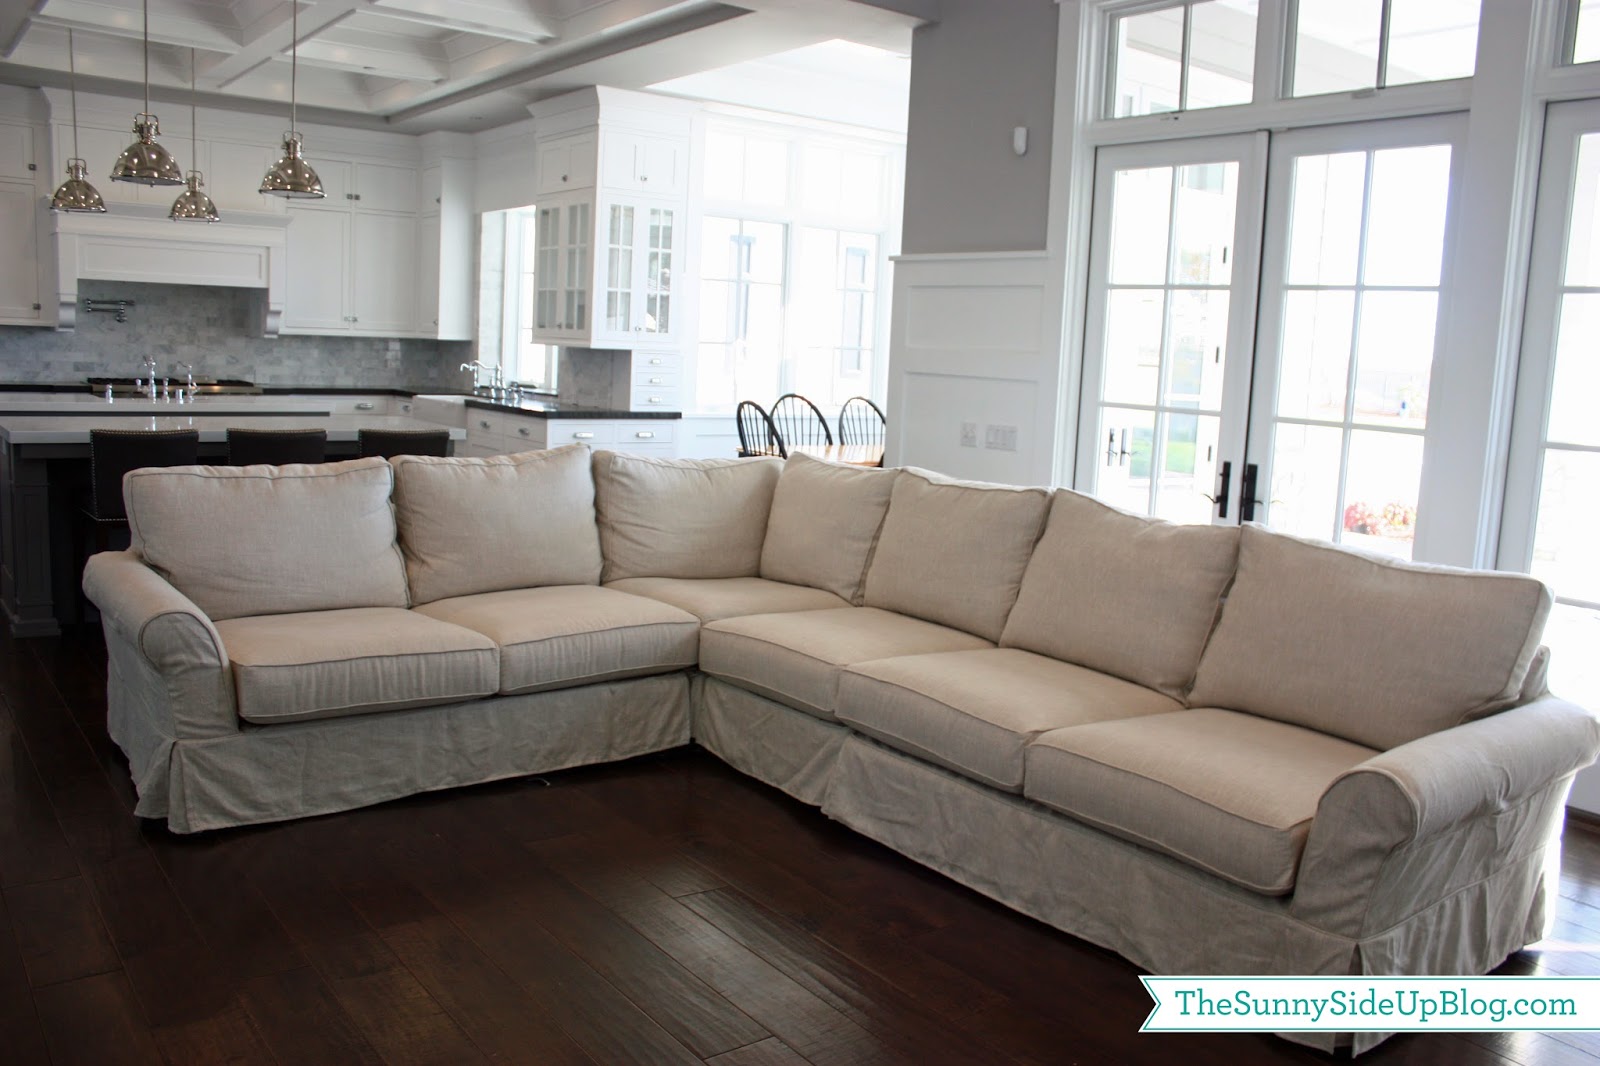
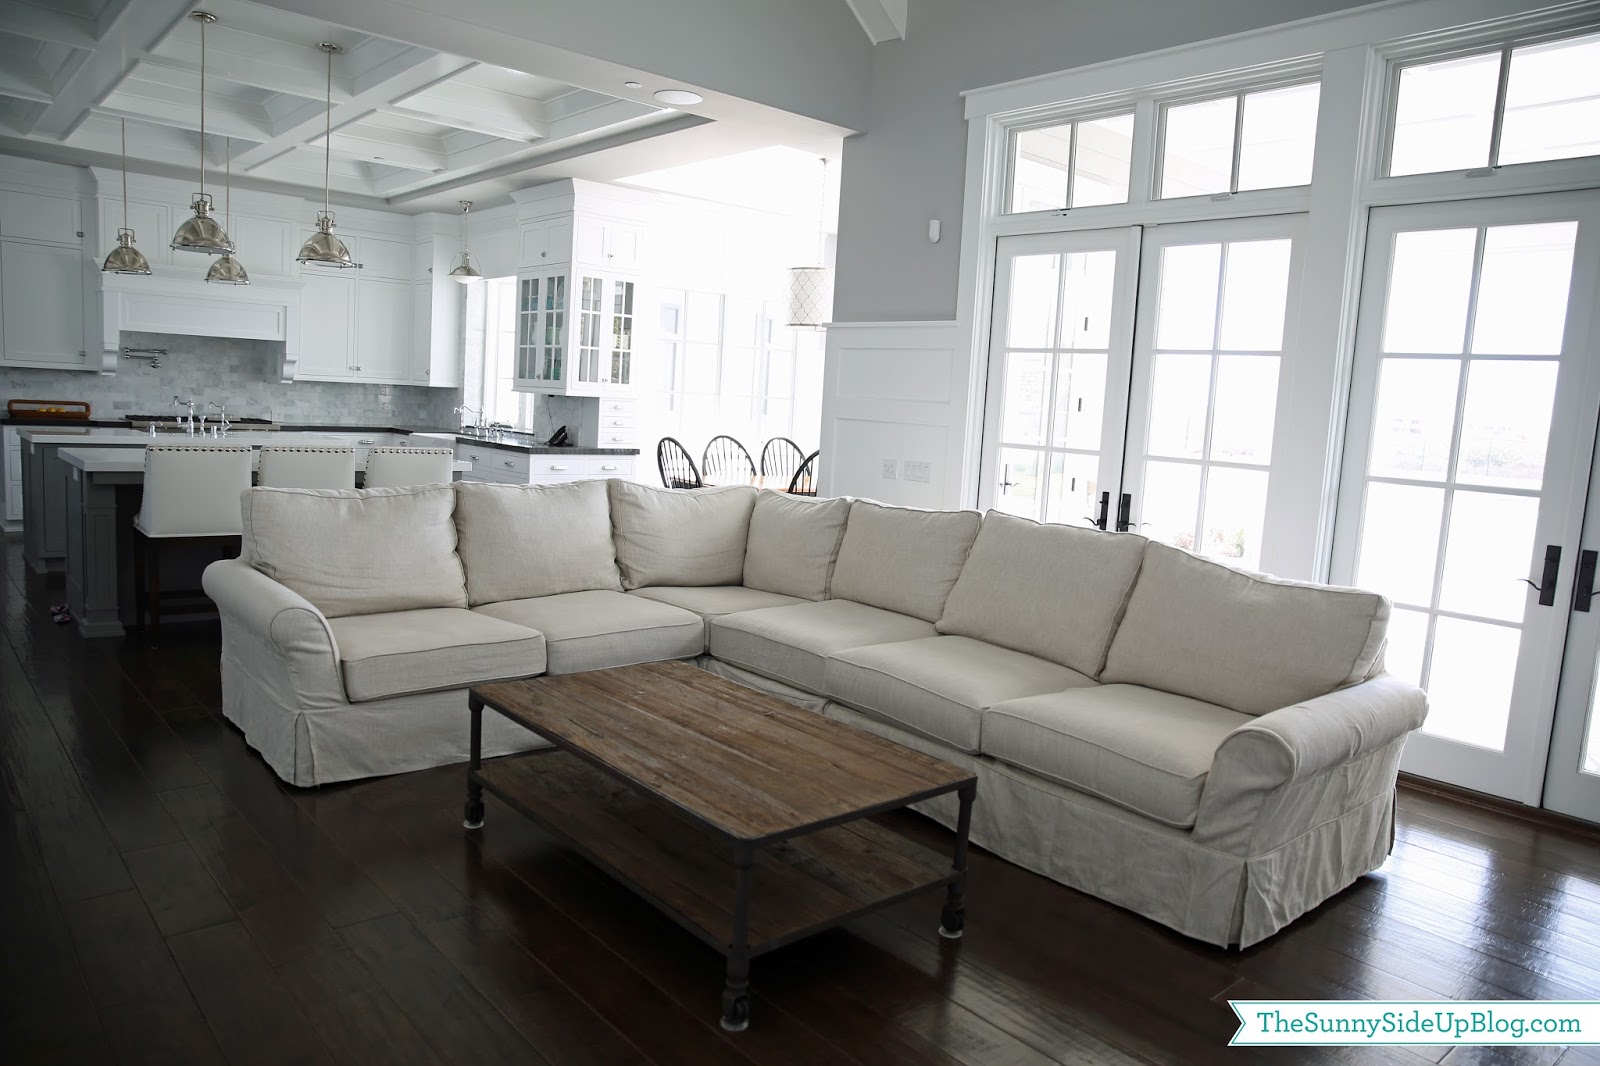
We looked at SO many couches the last few months we were building.  Our previous couches in our old house we had for 11 years and they were literally holding on by a thread.  Like I seriously had a safety pin or two in various spots.  :)  So I knew this next couch would be with us for the long haul and I wanted to make sure it was the look I wanted and really comfortable.  The Pottery Barn Comfort Sectional fit the bill.  I love the feel of the cushions and the slipcover look.  These pics were taken soon after it was delivered and it really needs to be ironed!  Or steamed.  Or something.  Ignore the wrinkles.  :)  
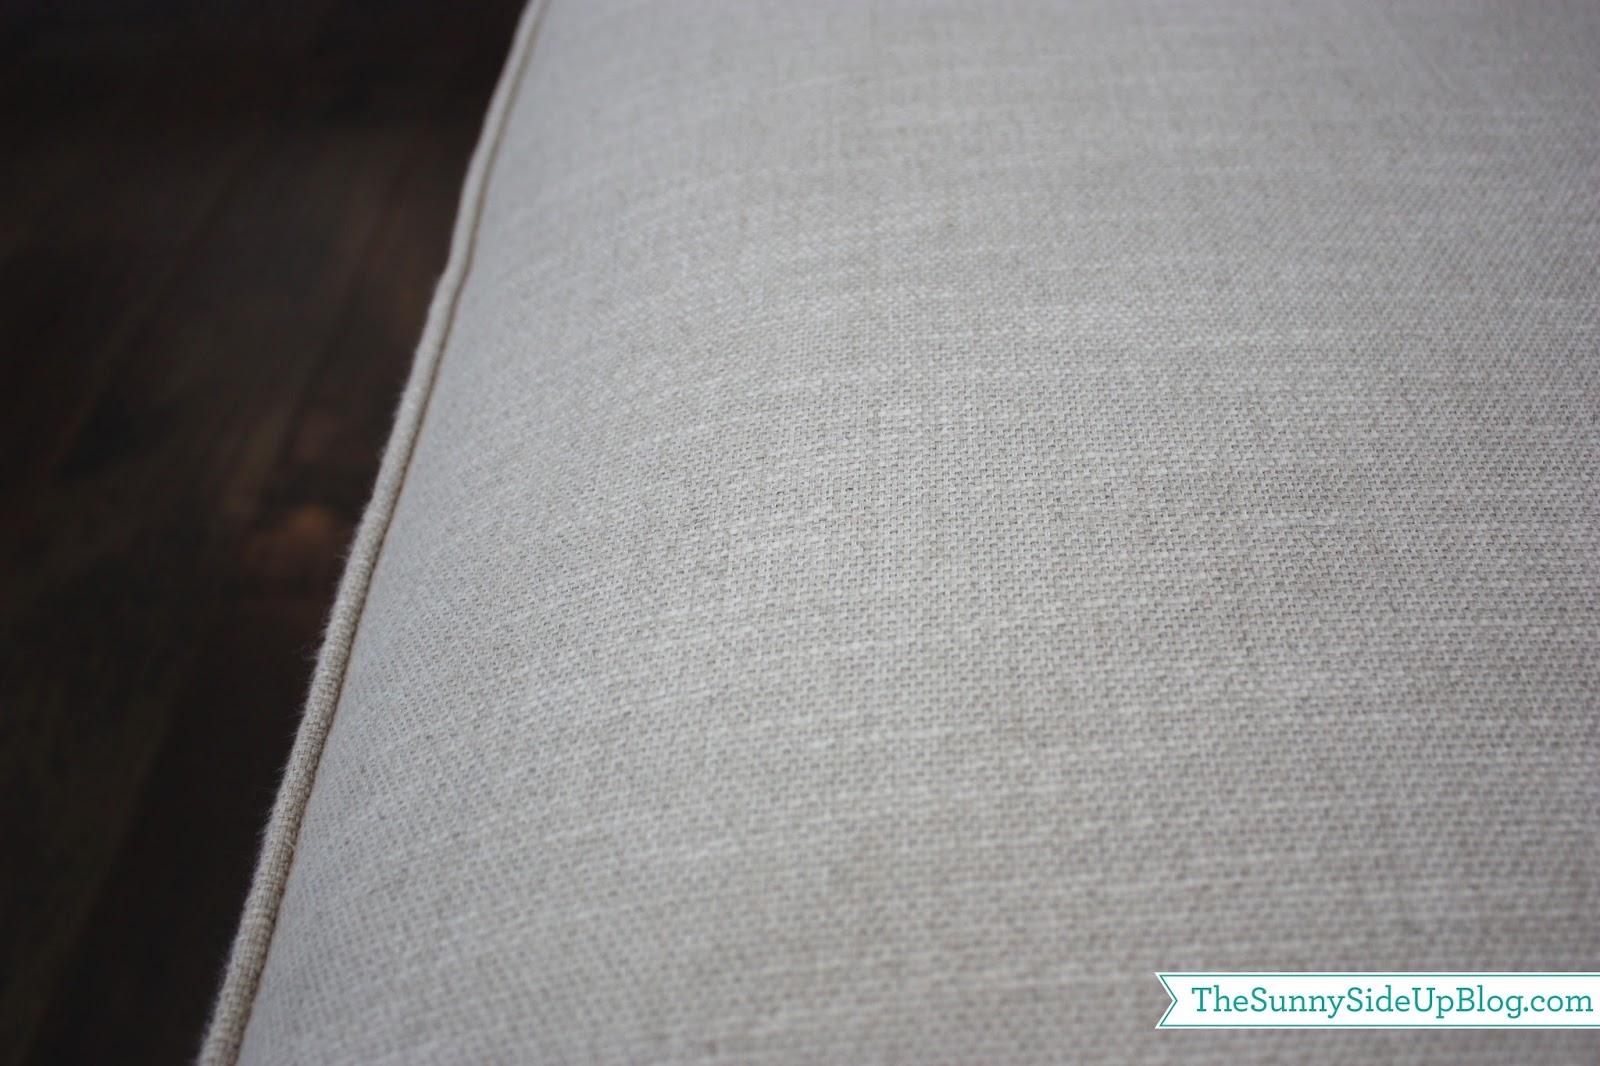
I made a stupid brave decision to upgrade to a fabric that is mostly linen.  I can’t remember the name of it – I’ll have to look for my swatch if anyone wants to know.  It’s an oatmeal color that has grey tones in it.  
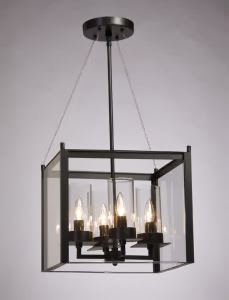
I mentioned earlier that I wanted something that matched my light fixture and this is exactly what I was picturing.    

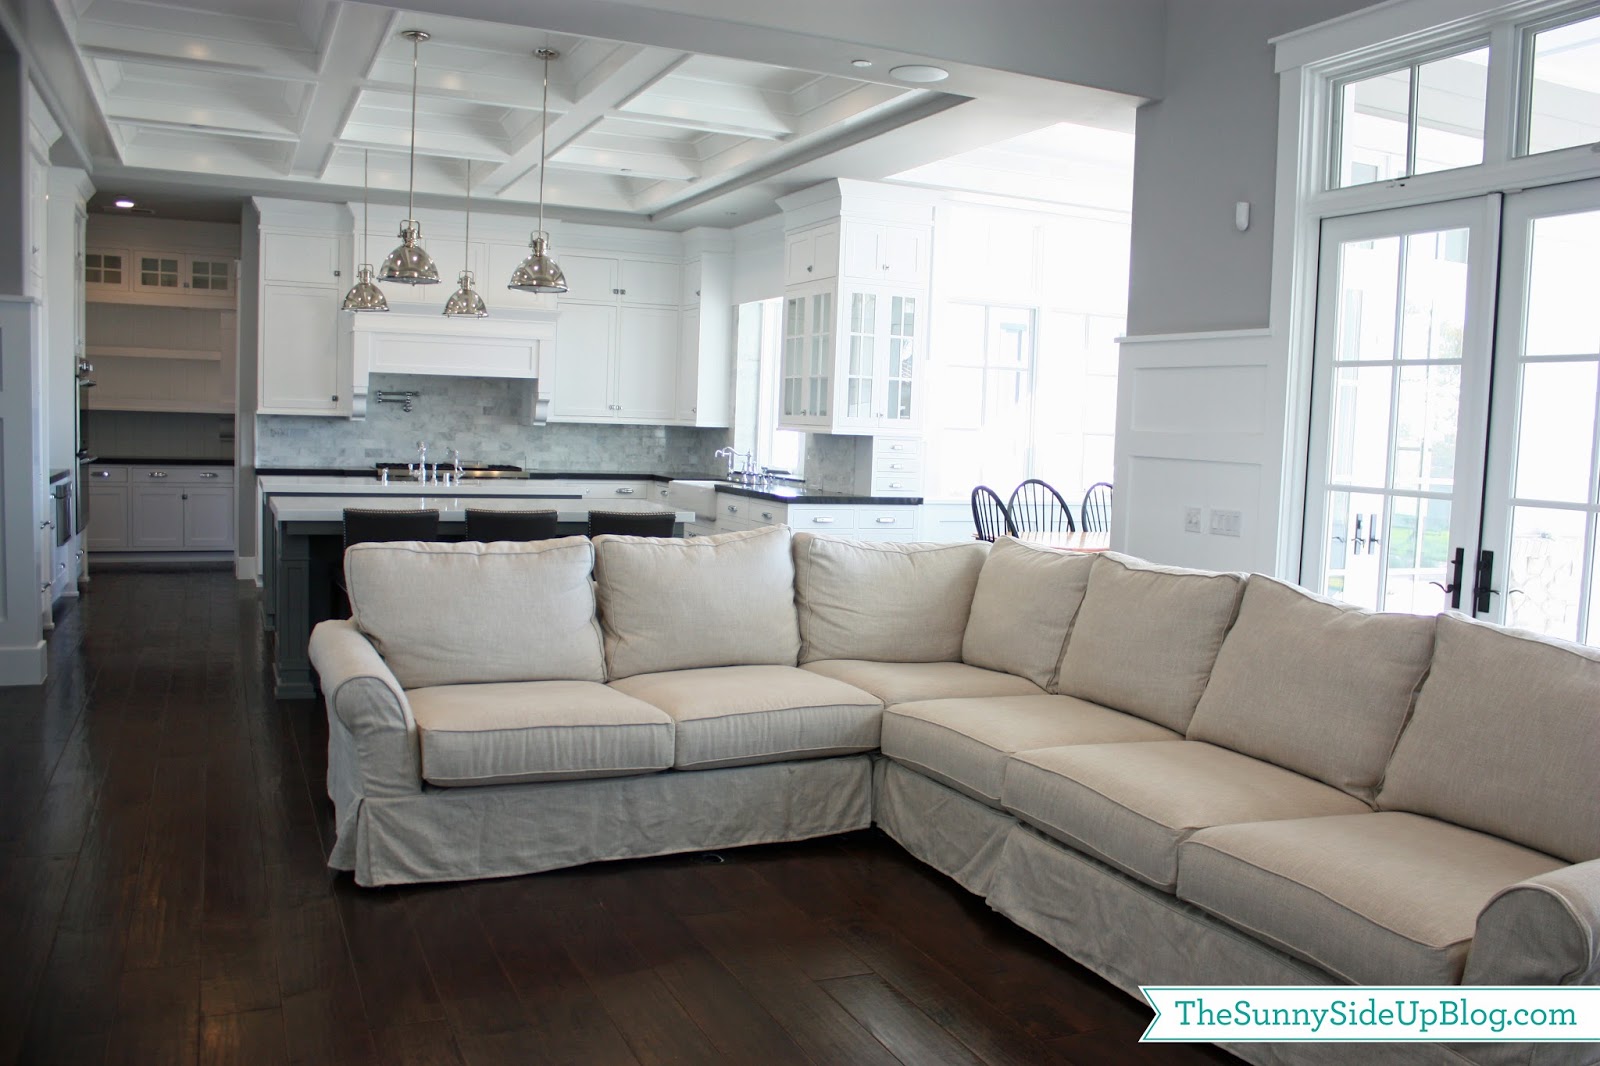
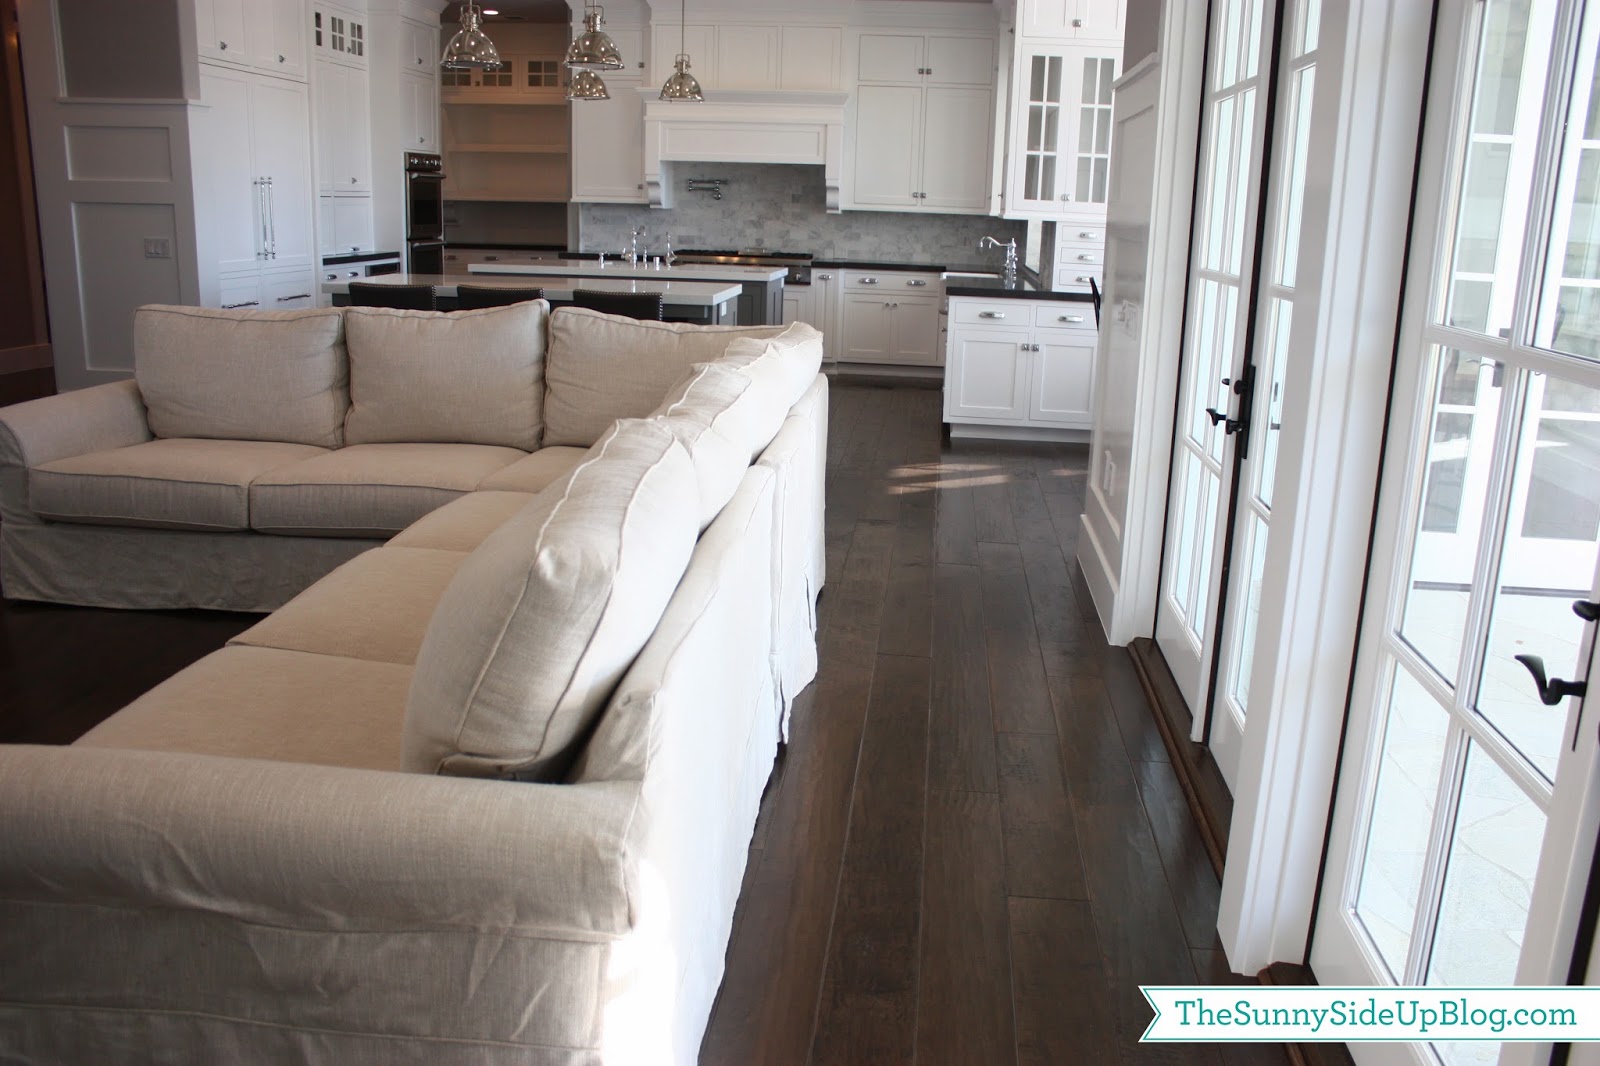
We almost put two smaller couches in this room with an end table in the middle, but decided on this sectional to maximize seating space.  So glad now because the corner is the spot we all fight to sit in!  I’m sitting in that corner of the couch blogging as we speak.  Or as I type I should say.  I feel like we’re all just chatting, don’t you?  :)  This couch was also great for the space because we had to find something that left the main walkways open.  You can see the walkway from the kitchen on the left in the picture above.  
And this walkway on the right so that the french doors are easy to access.  We must have measured over 50 times to get the exact size figured out.    
So I have to tell you a quick story about my couch.  I talked myself into the nice, not so easy to wipe off fabric (because I loved it!) telling myself “we’ll be careful.. my kids don’t eat in the  family room.. we never had major spills on our old couches..”  One week after we bought this couch Kole got sick and threw up ORANGE GATORADE all over it!  I kid you not.  We were all sitting on the couch talking and out of the blue he just threw up!  ORANGE!  I about died!! I stood up and said in shock “that did NOT just happen!”  Then Kole started crying and I forgot about the couch and rushed him to the bathroom and while I hugged and loved and took care of my sick little boy Kenny took off the slipcover (thank goodness I had enough sense to at least get the slipcover!) and rushed it to the dry cleaners.  It mostly came out but there is a slight orange ring around one part of the seat so we flipped it on the other side.  Can you believe that!?  11 years and three babies with my old cheap couches and nothing like that ever happened.  We buy this nice new couch and BAM.  One week later – orange Gatorade.  Never fails!  Fully aware now that I was an idiot to not get the everyday suede that wipes clean.  Alas.  Beauty over function never wins when little people are involved.  :)
K.  I’ll stop rambling.  On to more decor!   
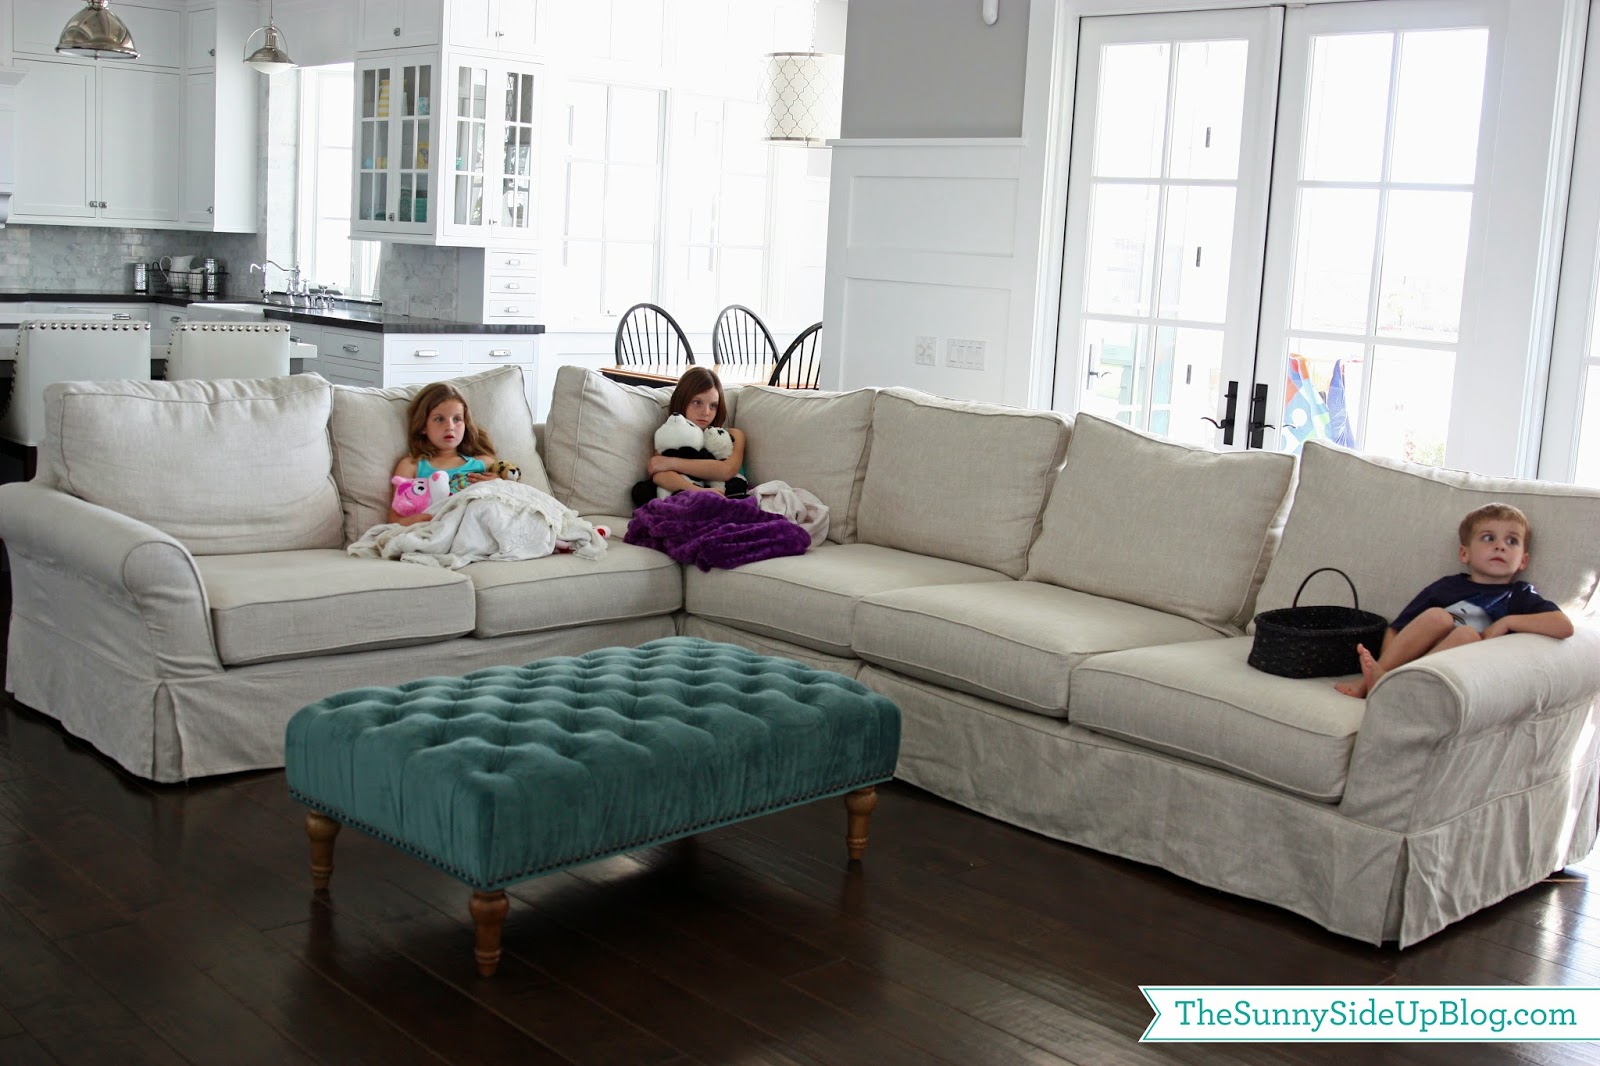
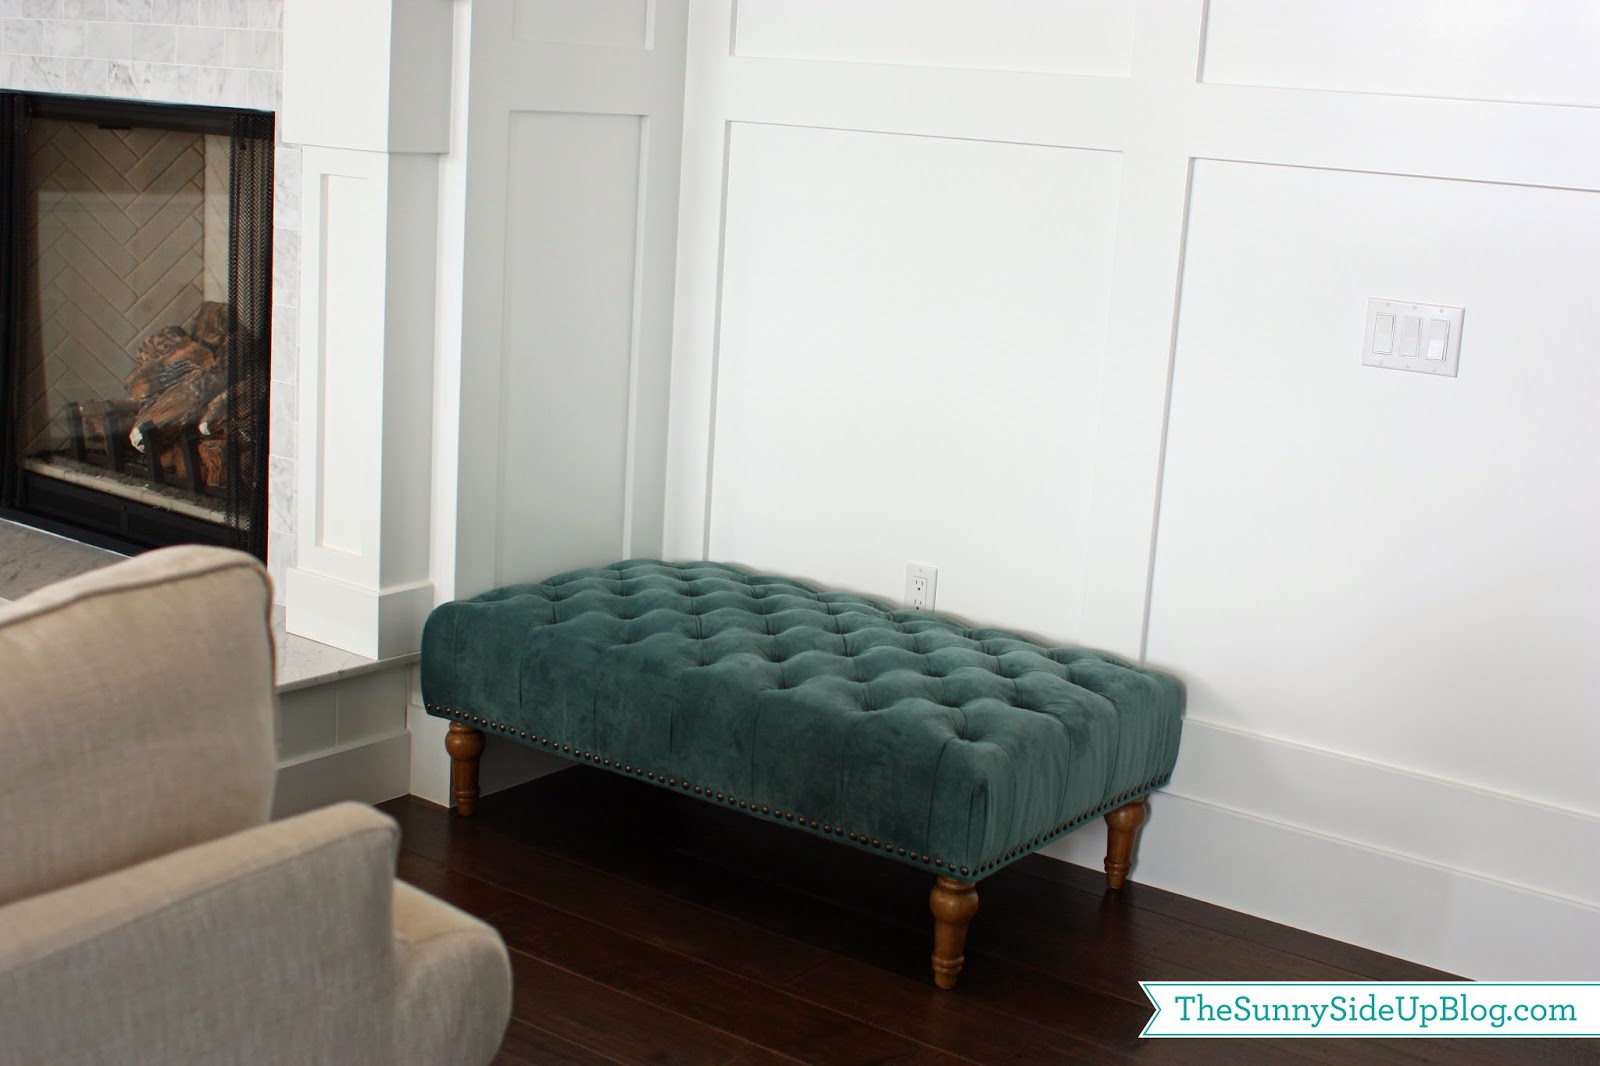
I bought this teal ottoman from World Market for a coffee table.  SUCH a great deal and I love it!  But it didn’t work at all.  We tried it turned the other way and it just wasn’t long enough.  It obviously doesn’t look right turned this way either.  (Can you tell my kids are in the zone in this pic?  Must have been a good episode of Paw Patrol.)
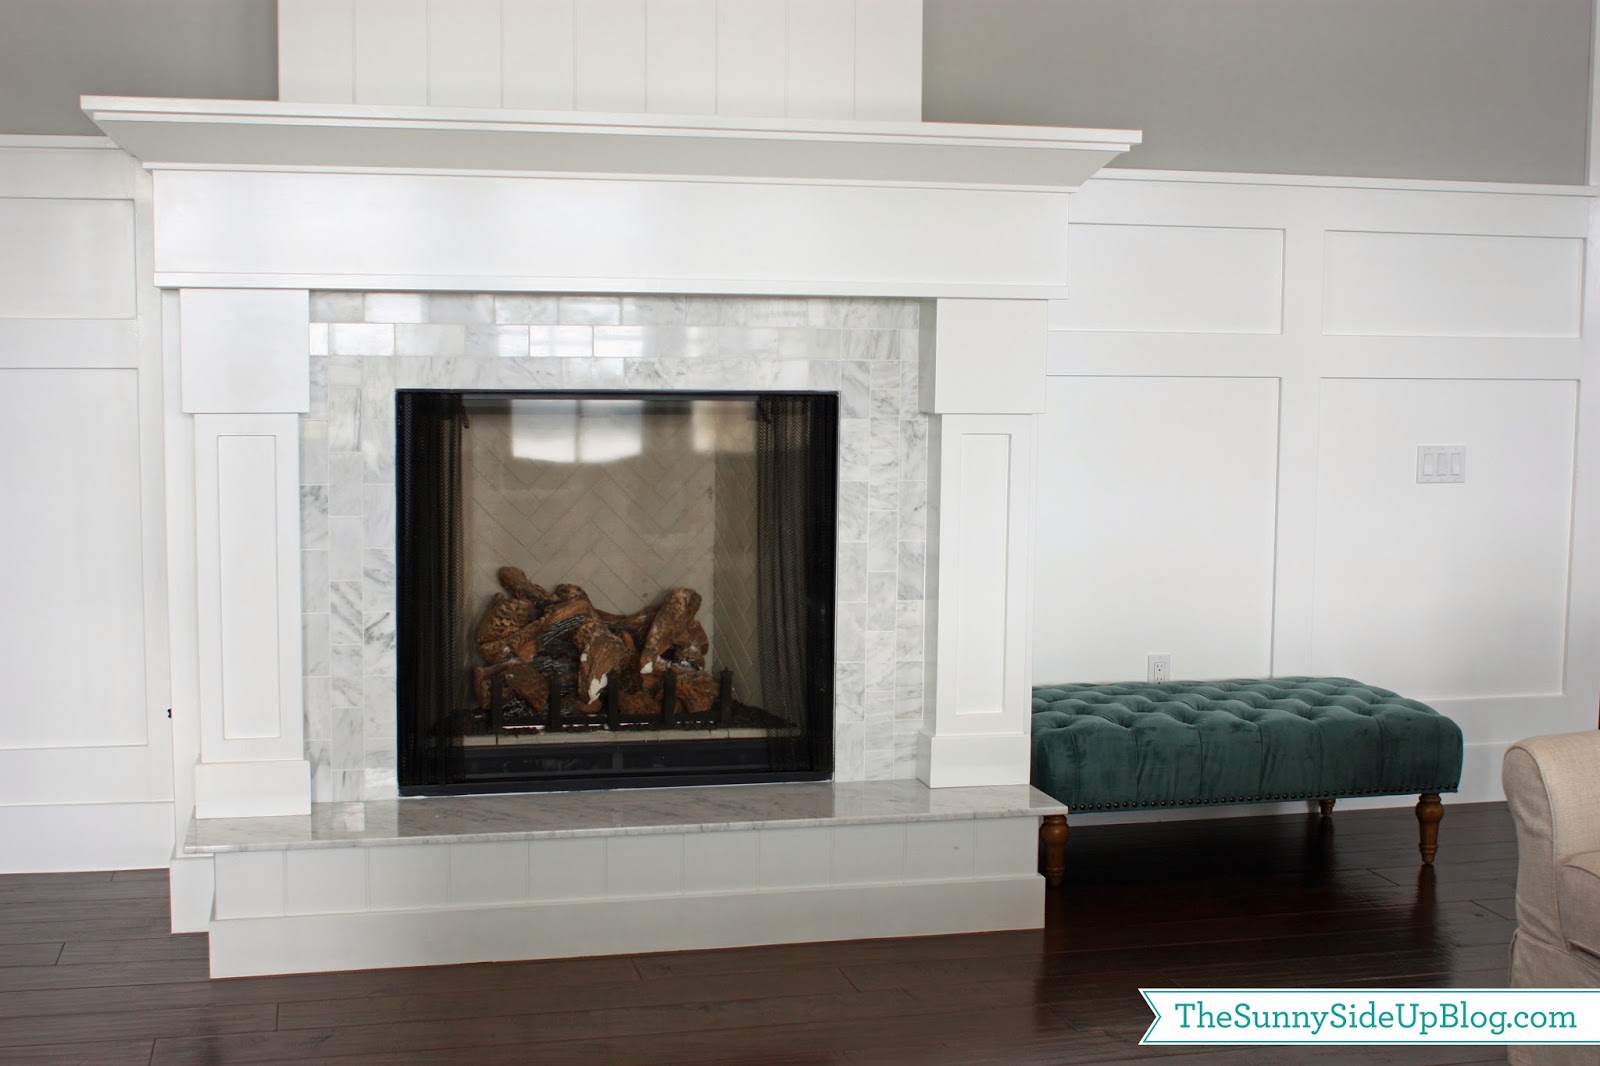
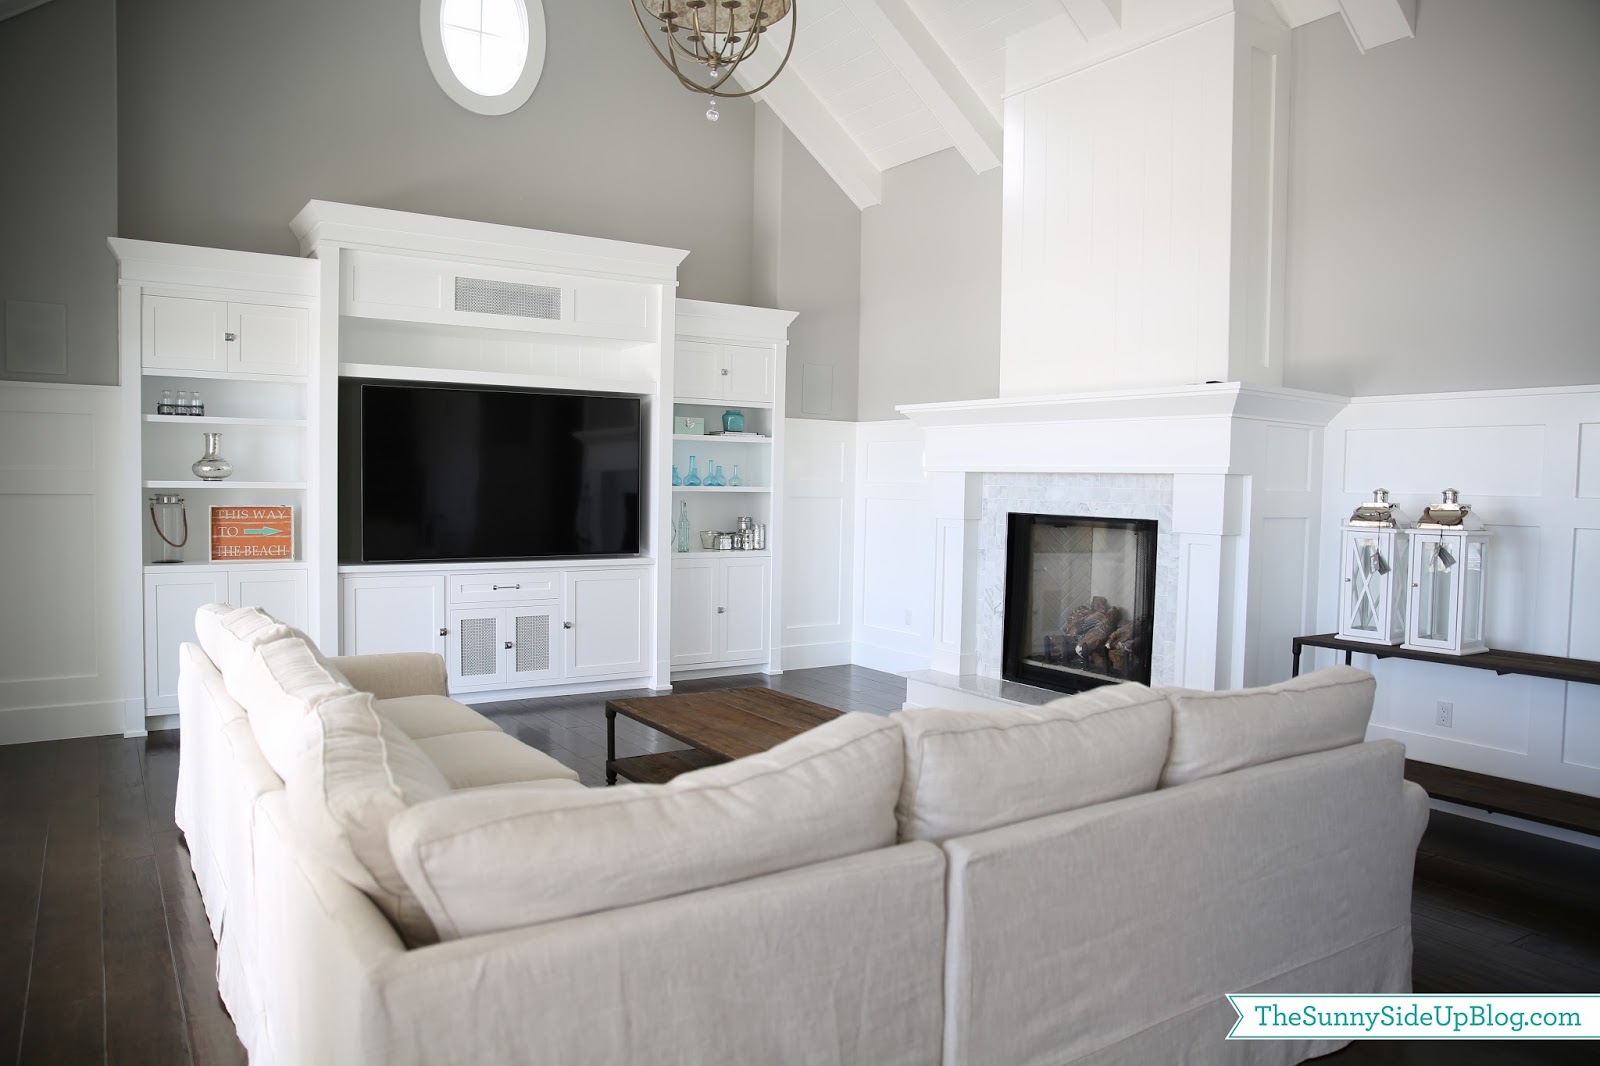
So I tried moving it to the right side of the fireplace.  

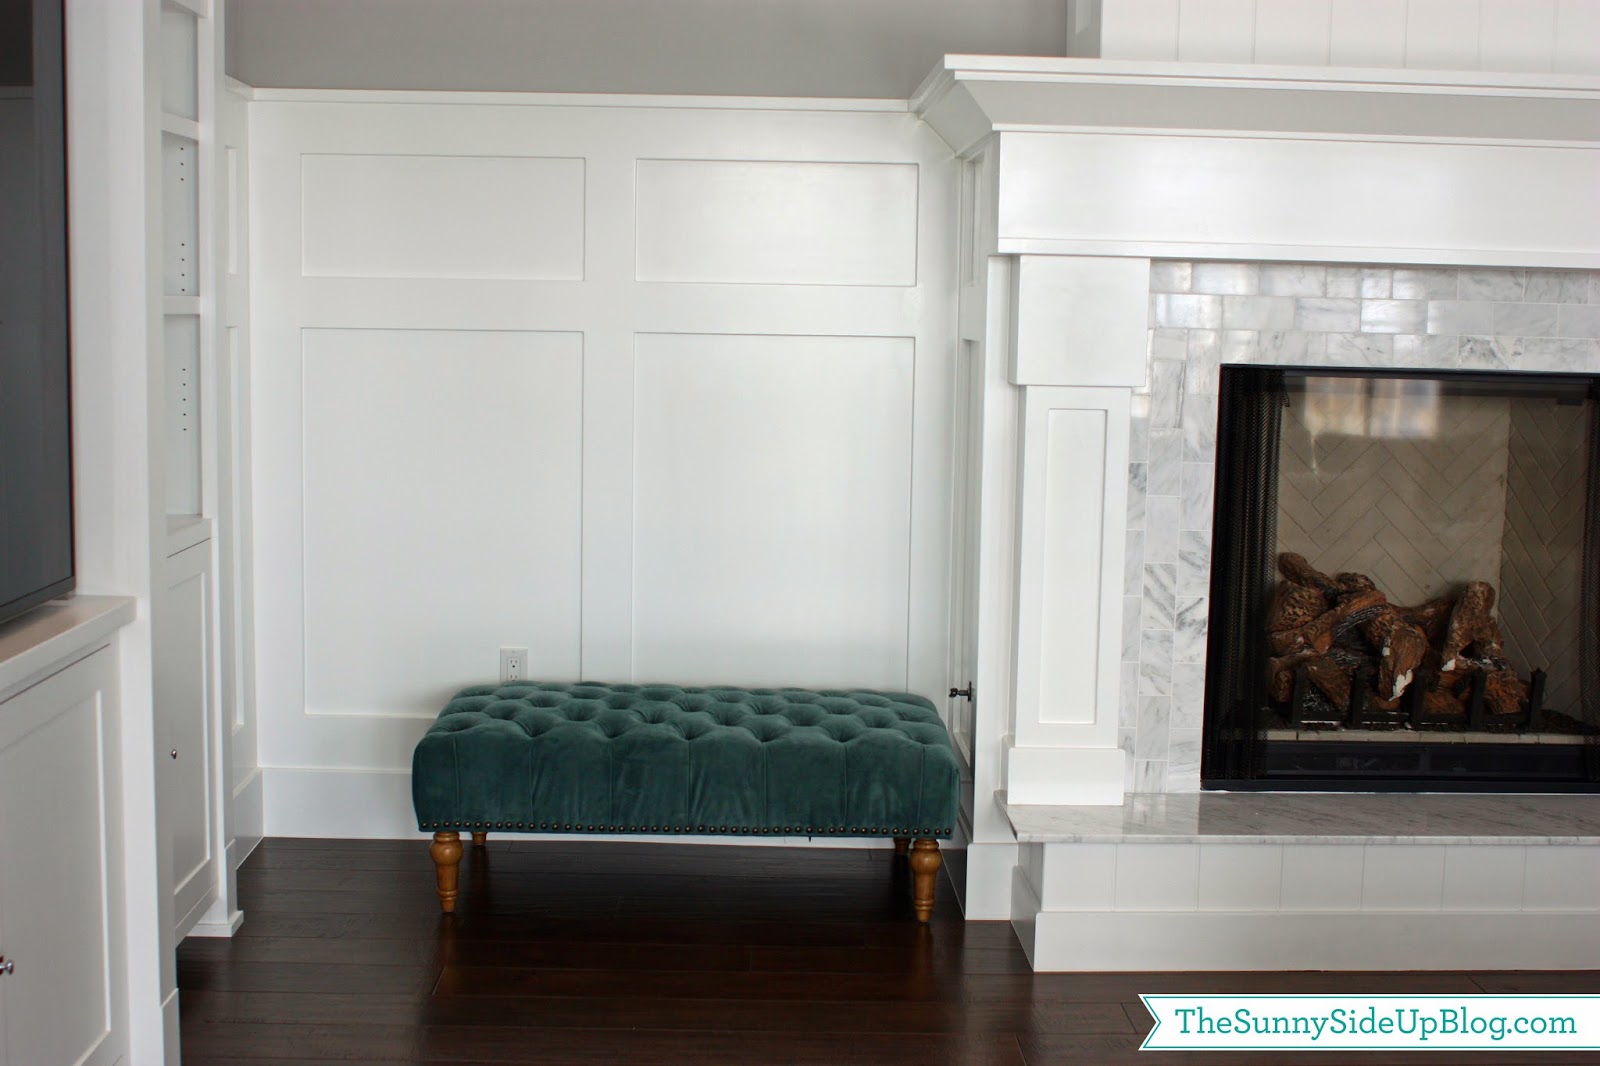
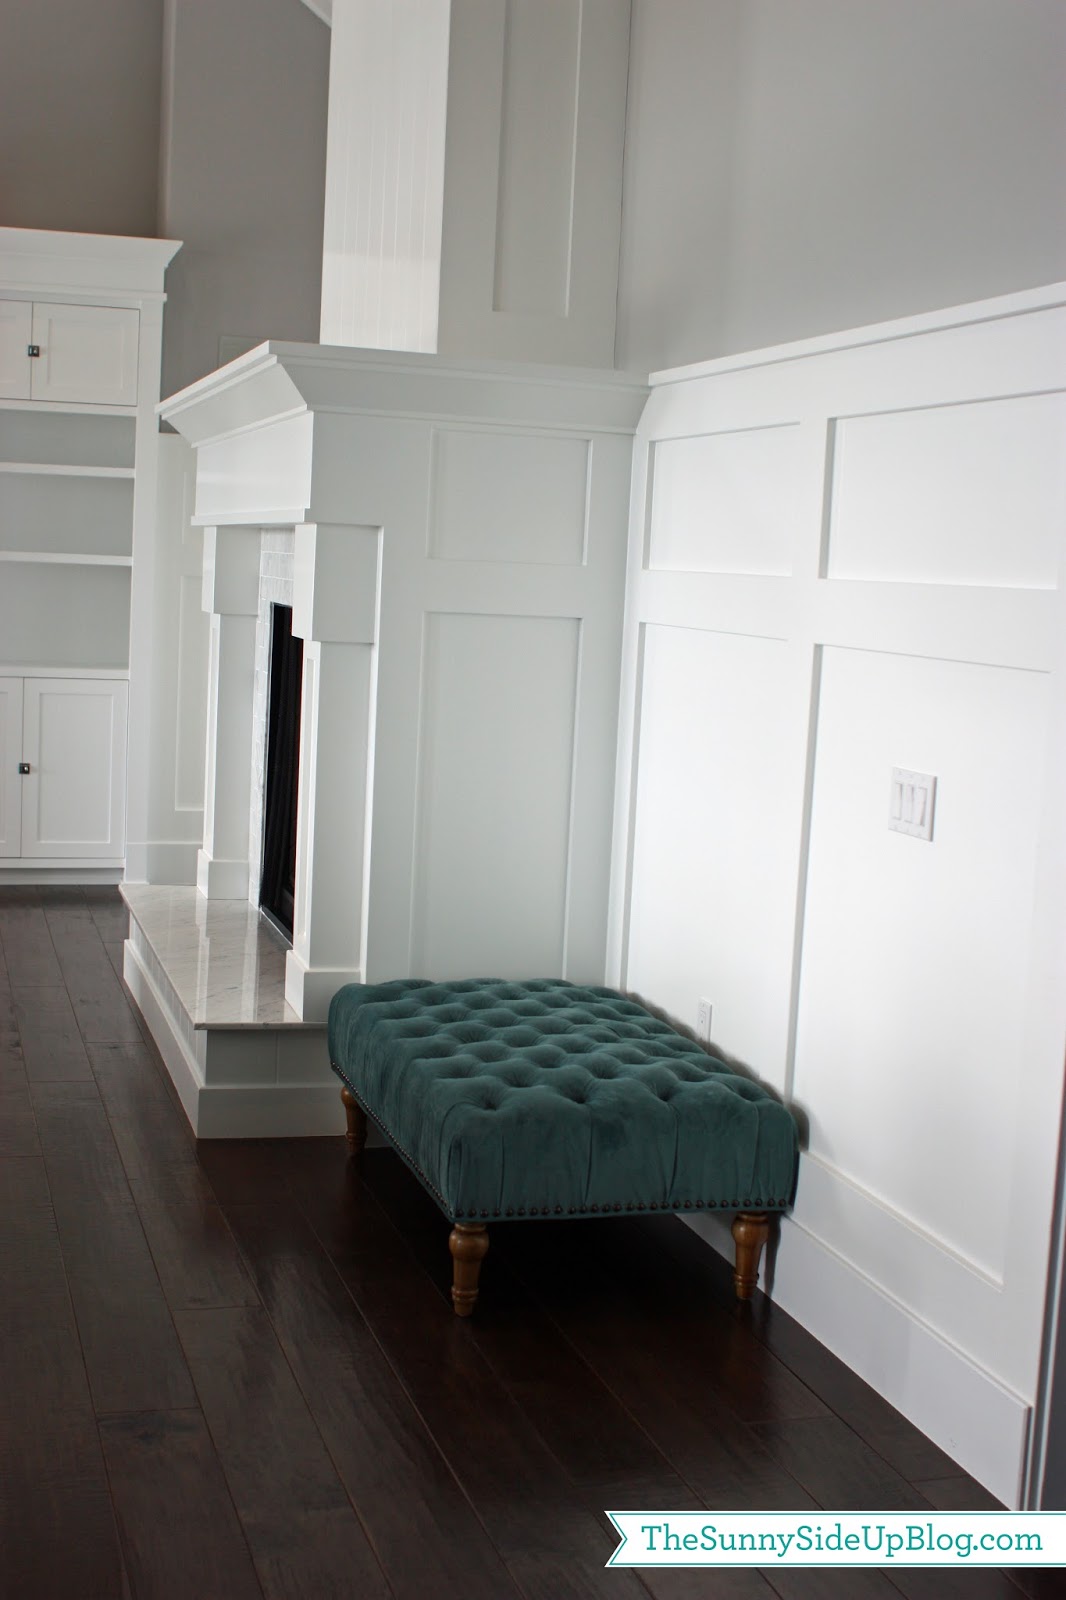
and then the left side of the fireplace.  
Didn’t like it in those spots either.  
LOVE the splash of color, but way too small and short for those spaces.  
I am keeping it and still trying to figure out where in my house it will work.  
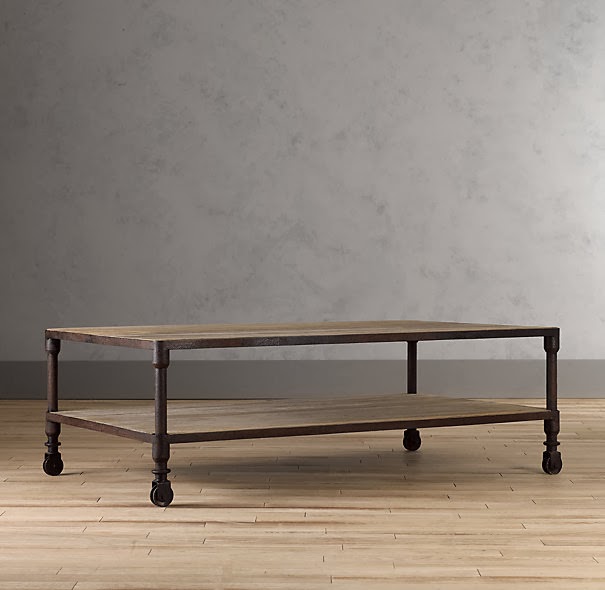
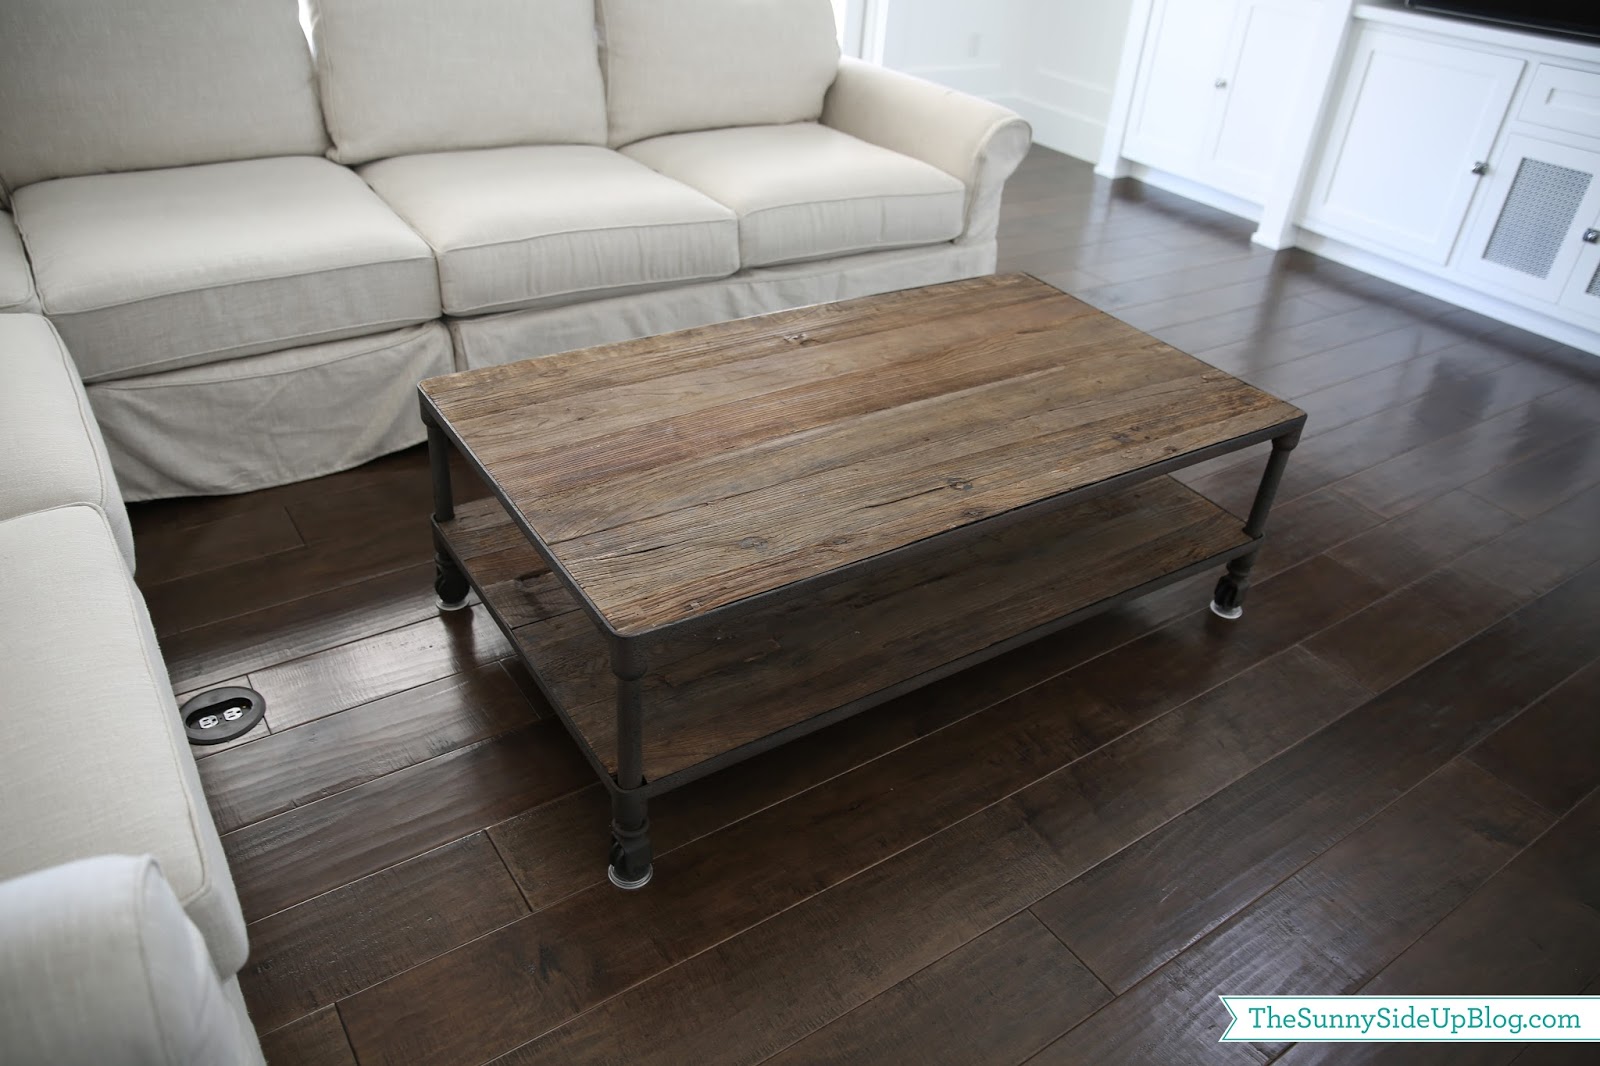
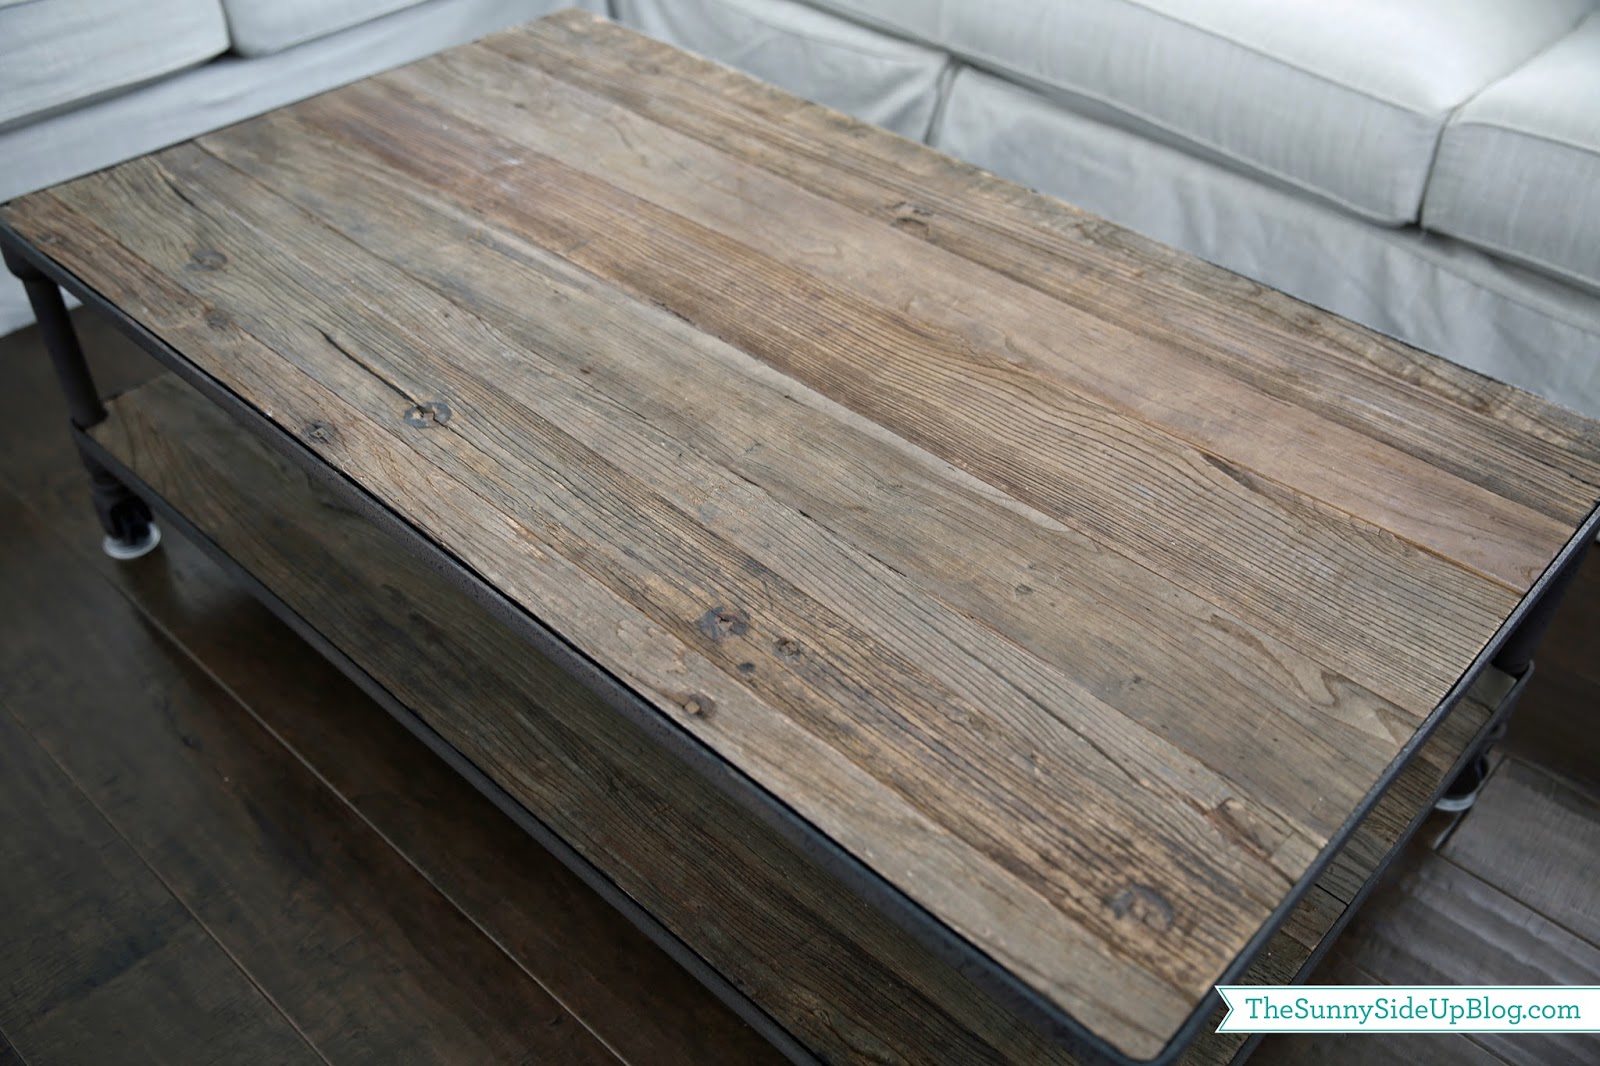
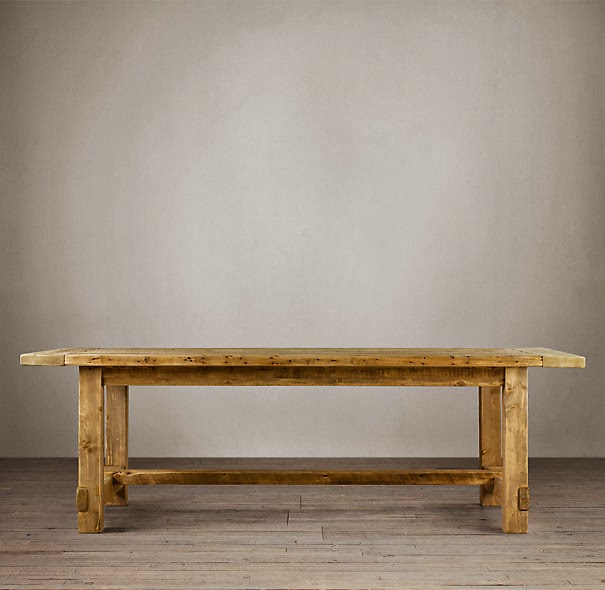
So I searched high and low for weeks on-line for a coffee table I loved that fit the space better and decided on the Dutch Industrial Coffee Table from Restoration Hardware.  

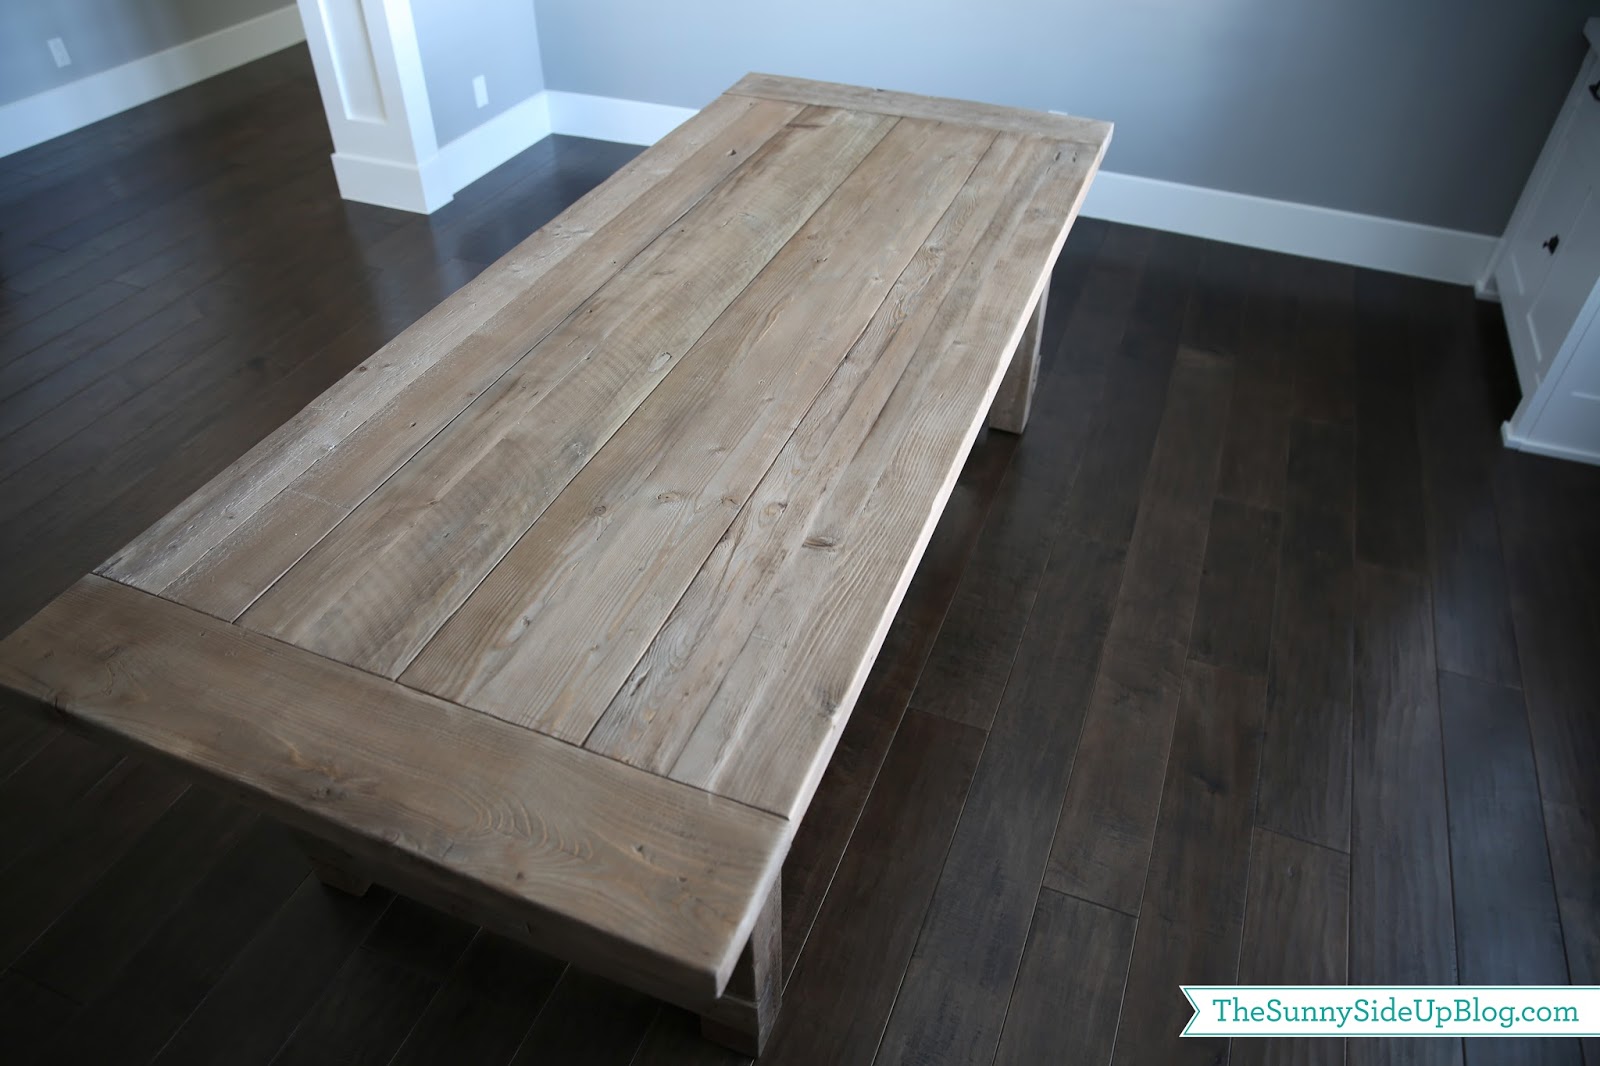
It wasn’t slid in the exact spot here yet – they had just delivered it when I took this pic.  And the lovely plastic floor guards will be moved once we get a rug.  But it fits the space perfectly!

I love the rustic, reclaimed wood, farmhouse vibe so this look really appeals to me.  Not so much to my mom who pointed out when she was here last that my coffee table might give her slivers.  :)

This is also a much better solution for us because every night after the kids are in bed our coffee table is piled high with papers, magazines, laptops, my lemon water, Kenny’s Coke Zero, stuff we are working on.  We needed something flat and durable.  :)

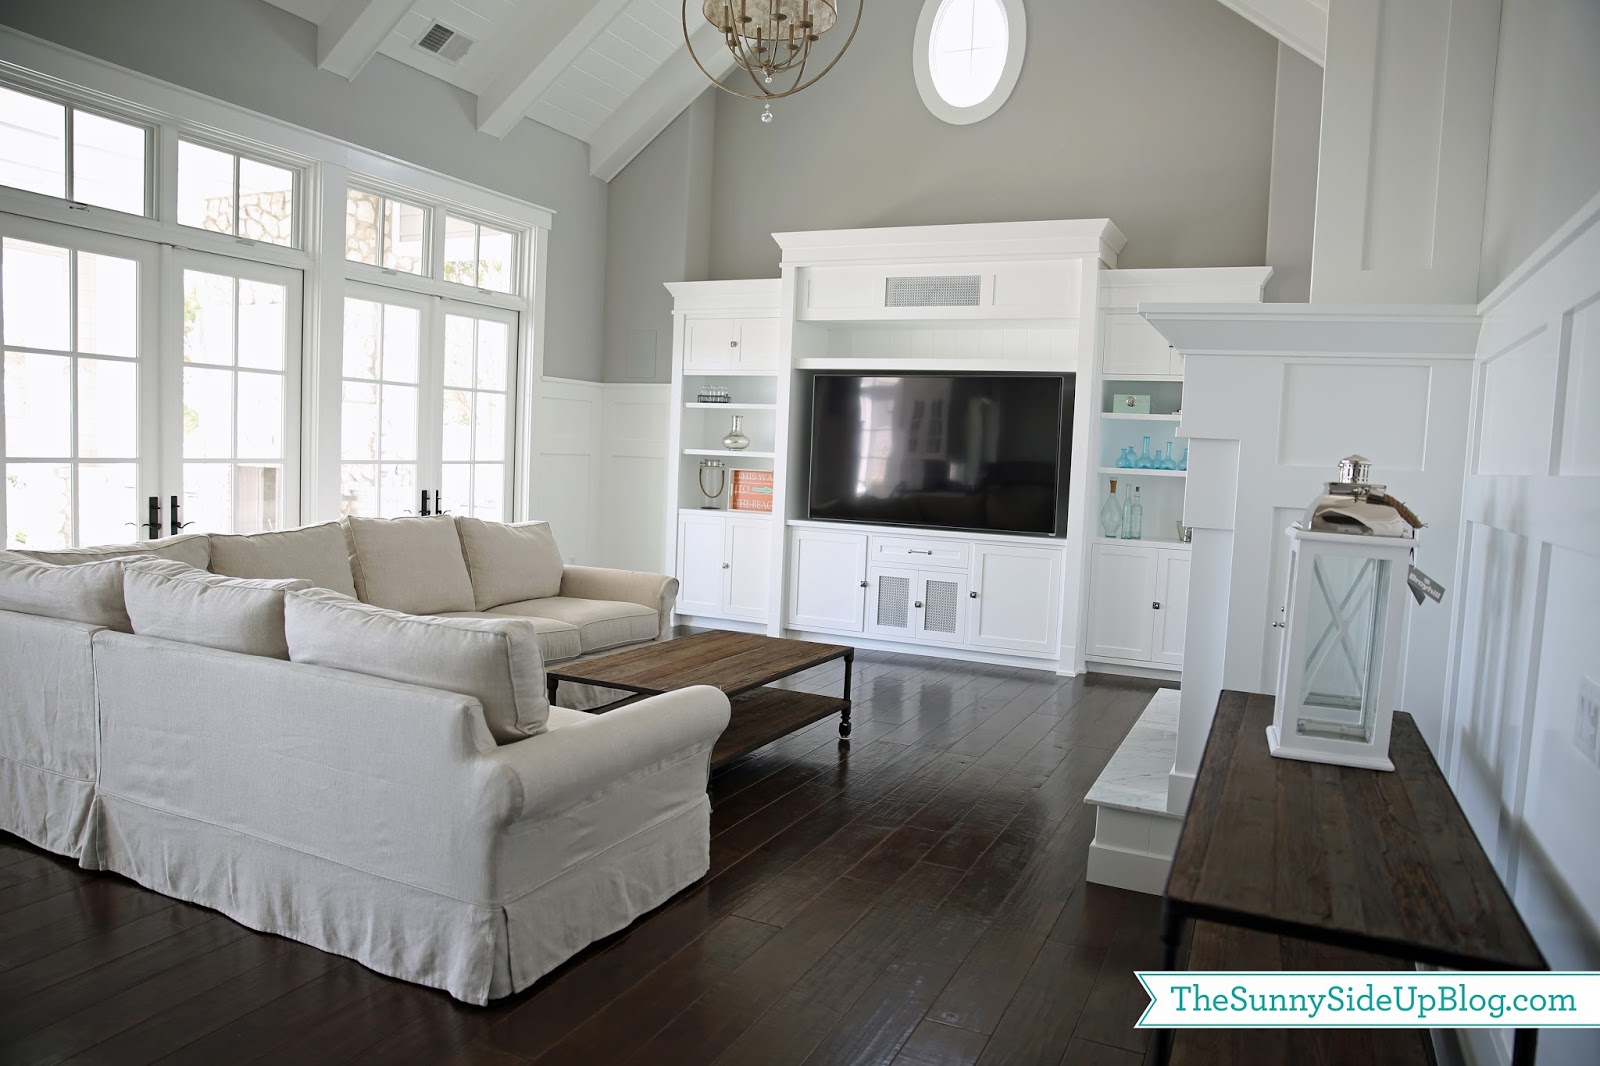
I haven’t started styling my media shelves yet.  I’ve just been rounding up a few things I might use…

These beautiful blue glass bottles were a Christmas present I relentlessly begged slightly suggested Kenny could get for me.   I’m not sure if I’ll use them all together like this or split them up.

 I may use a few of the silver containers I’ve been collecting. 

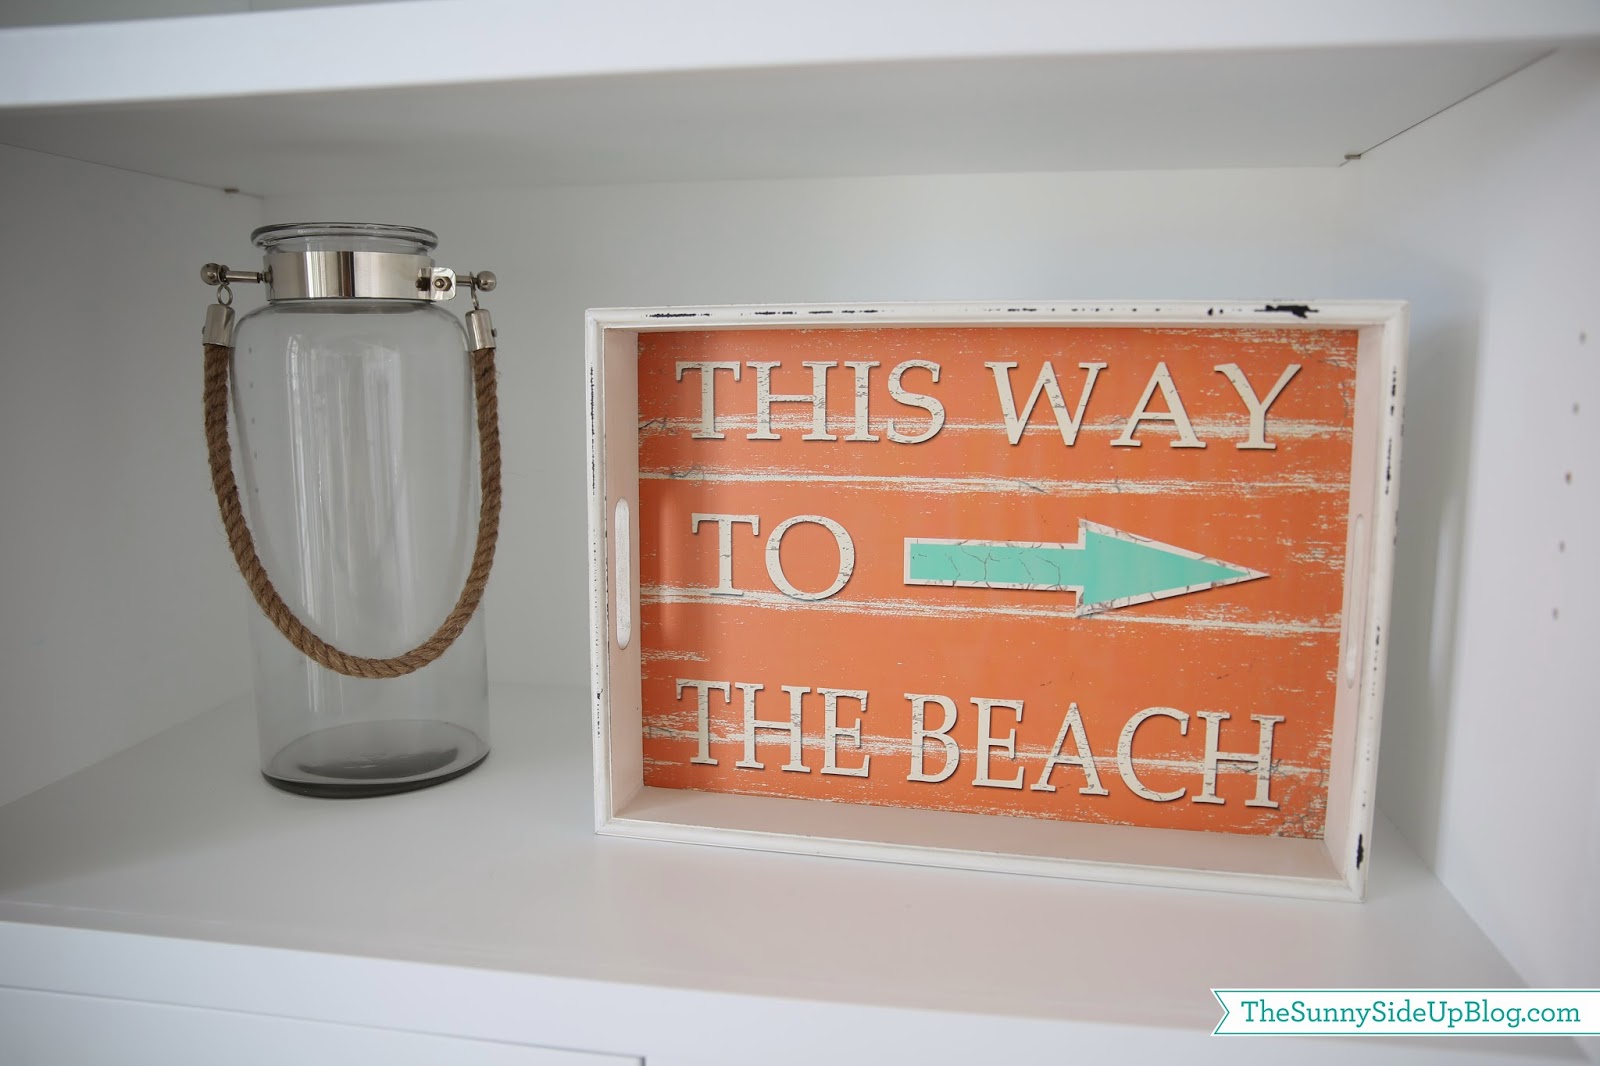
I found this beachy sign at Home Goods for 10 bucks and put it up debating if I should bring some orange in the room with the aqua.  Not sure about that one??

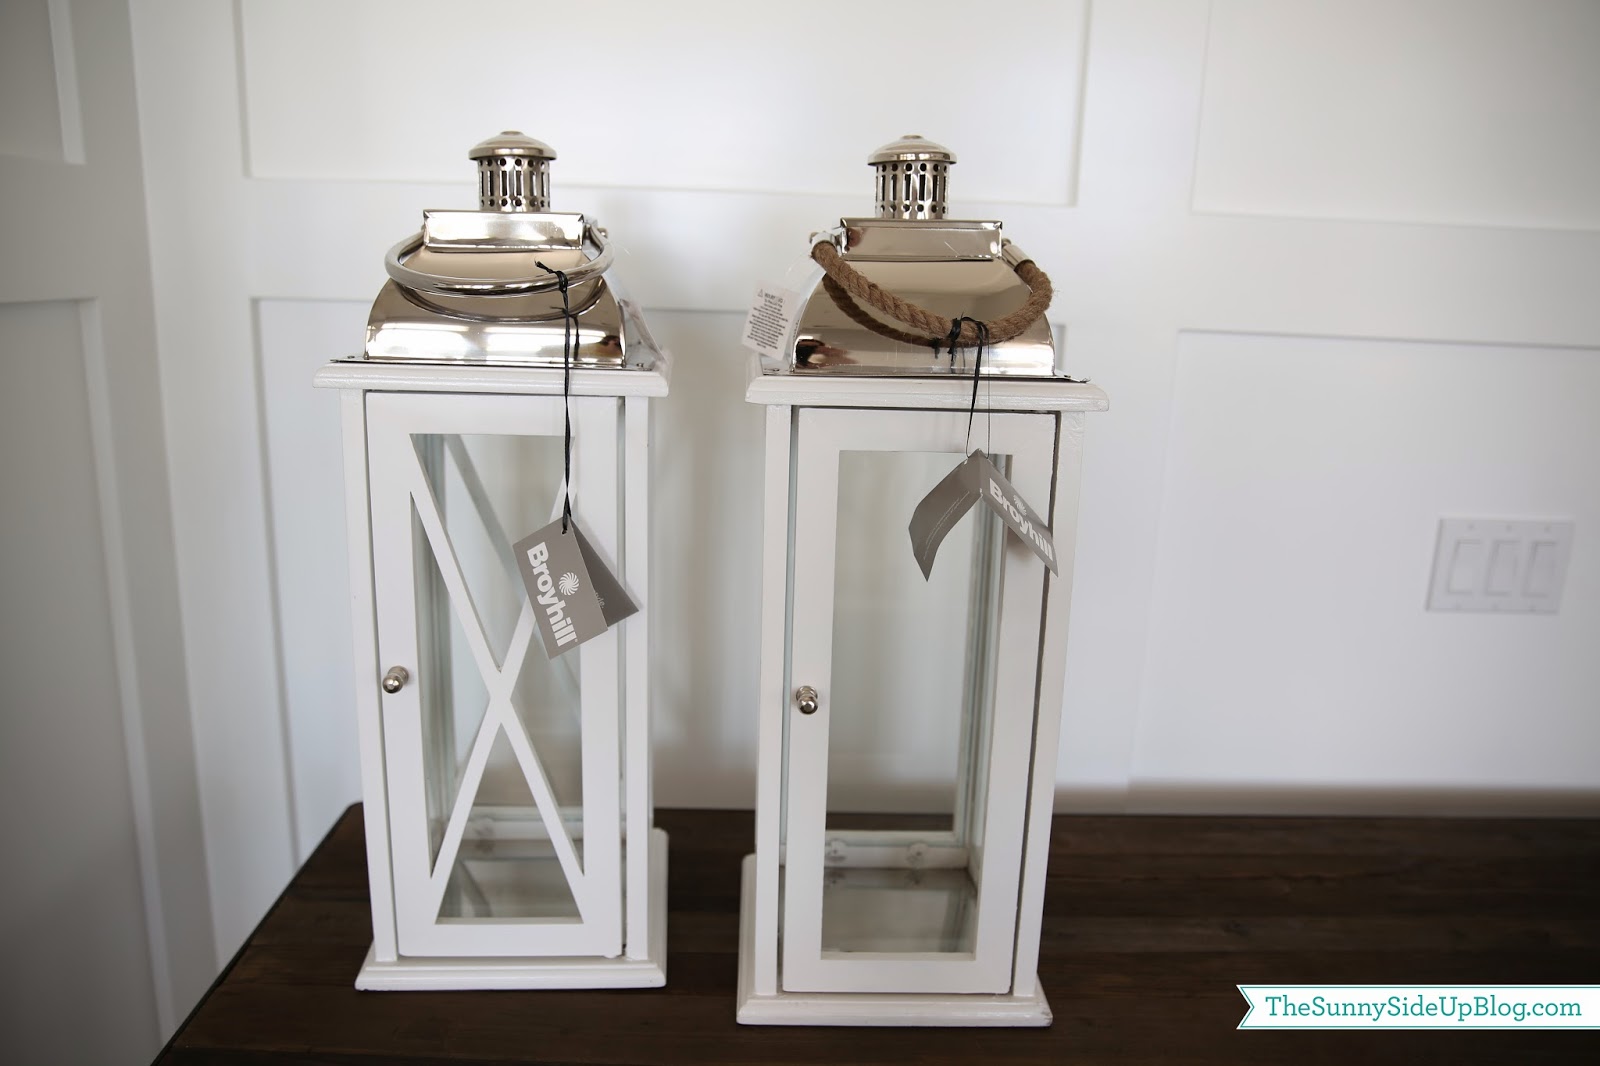
Also at Home Goods I picked up these beautiful lanterns!  Love them.  I especially love that one of them has a silver handle and one of them has a rope handle.  They won’t go in this space – I don’t like the white against the white.  But I know they will find a happy home somewhere!

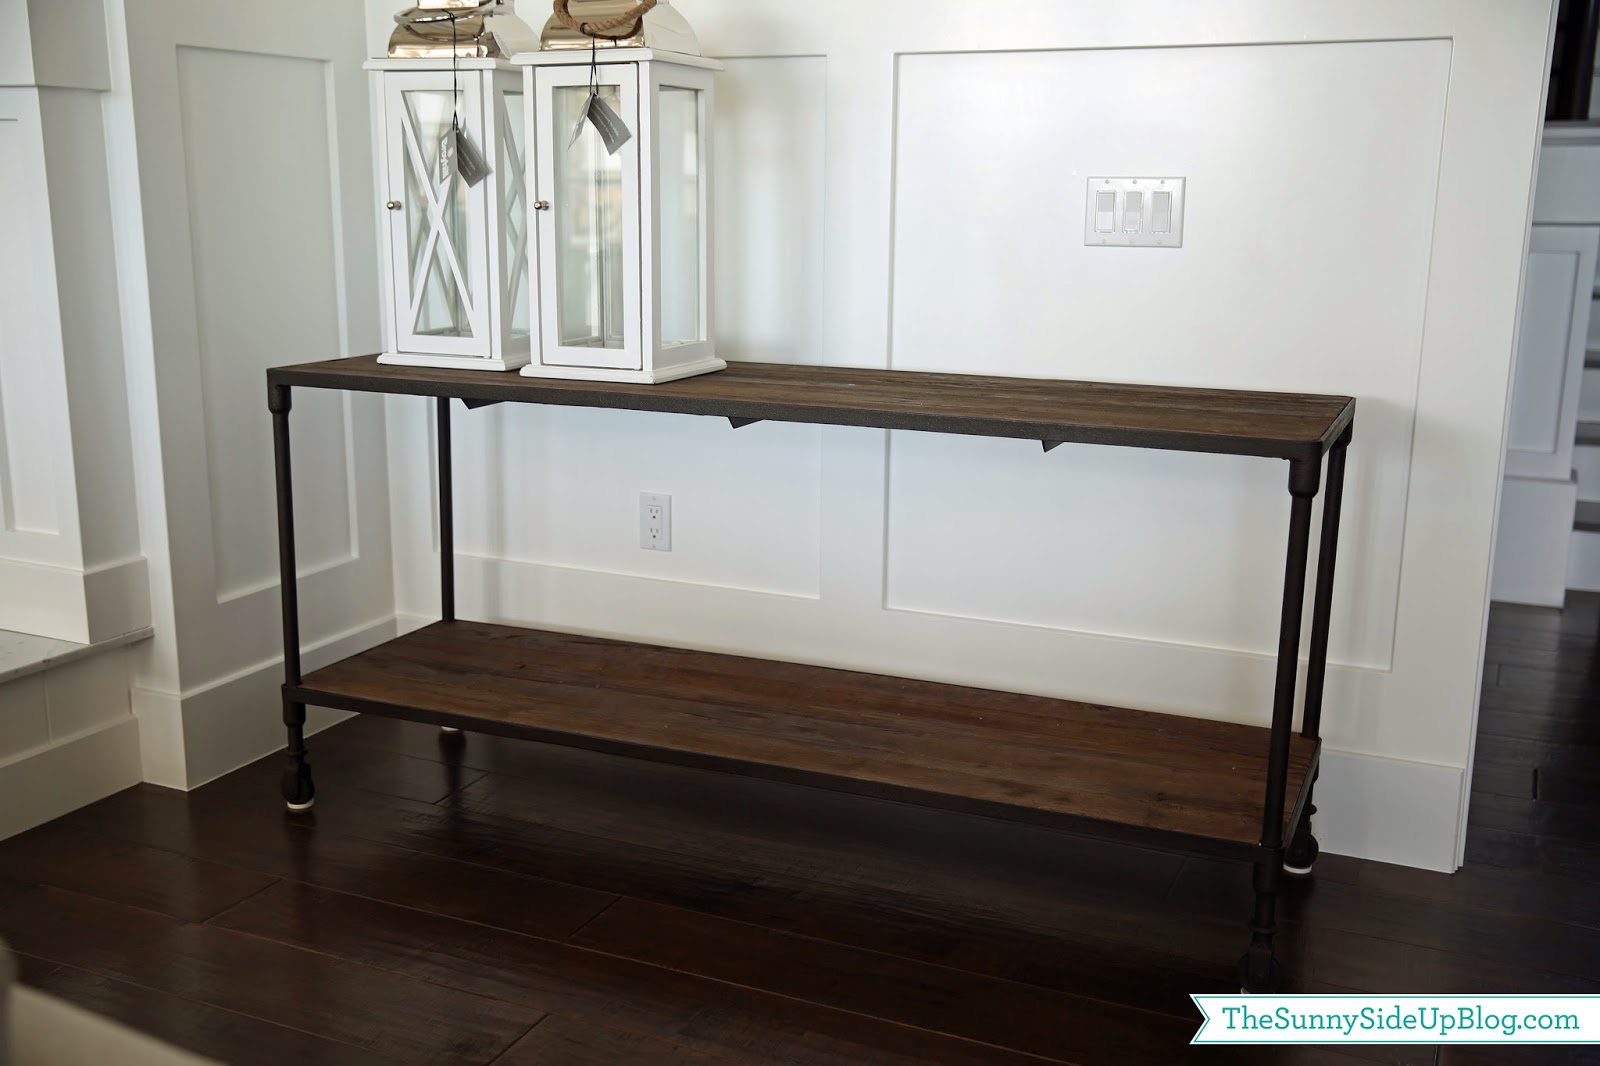
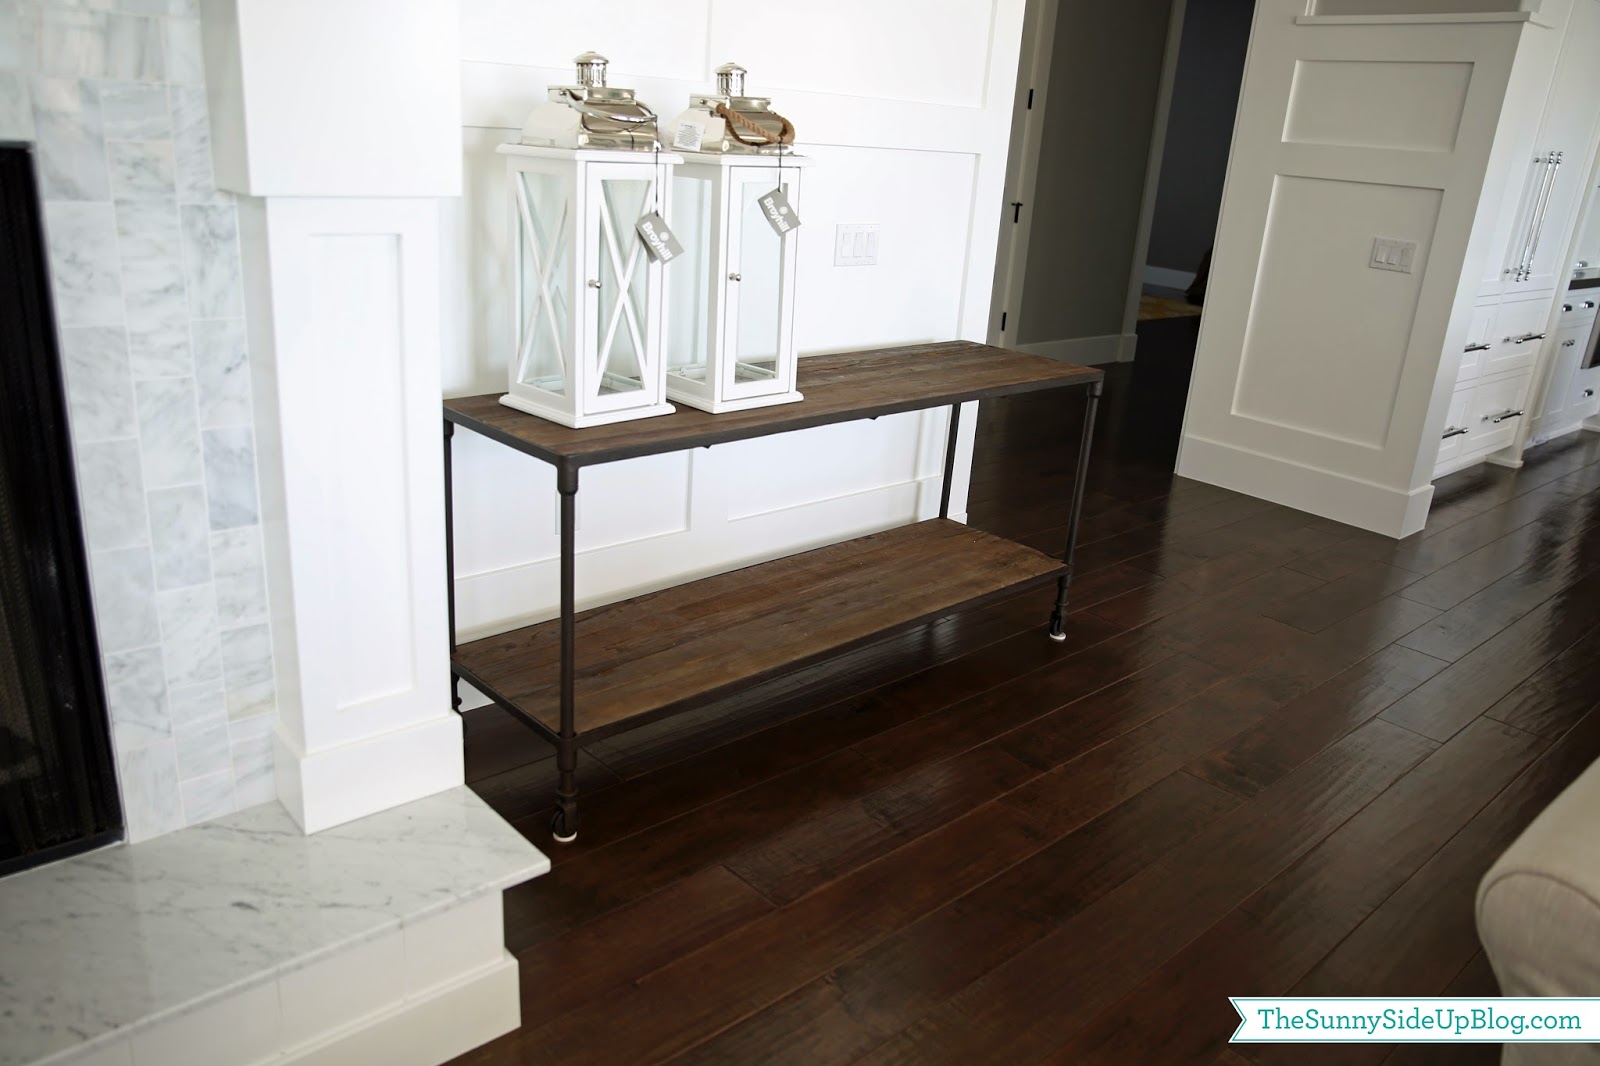
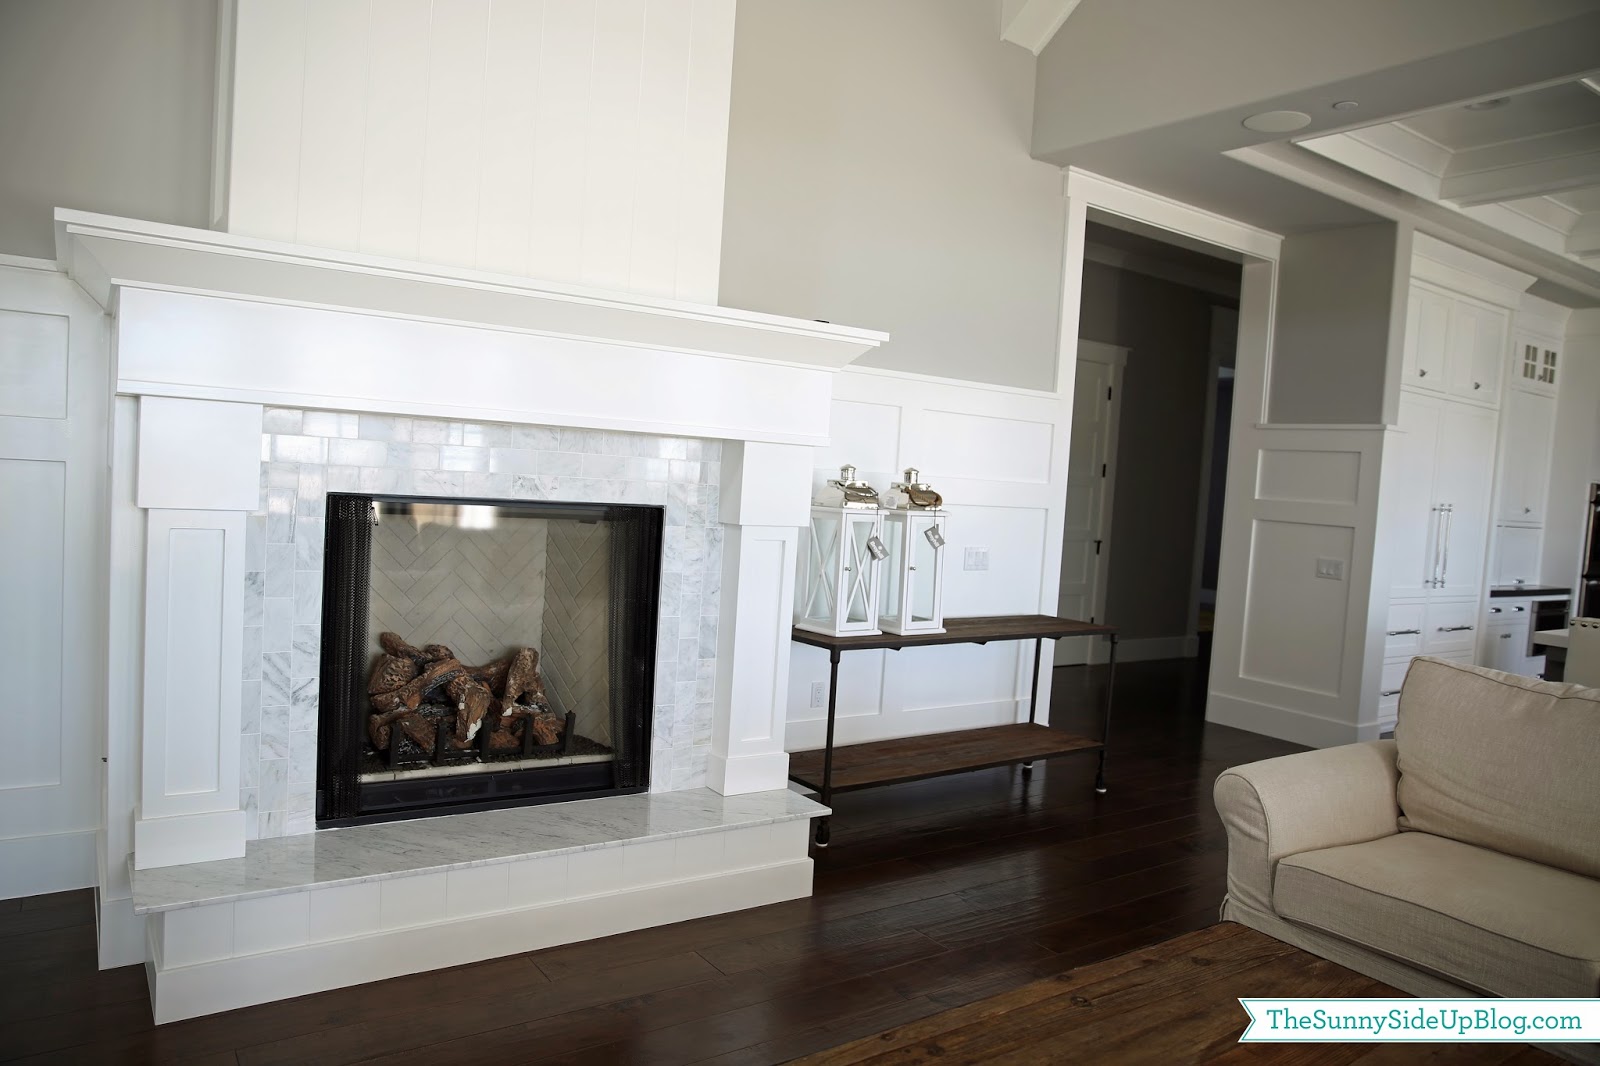
 I loved the dutch coffee table so much that I also ordered the console table that matches it for the right side of the fireplace.

I wasn’t sure about this console table at first, but now I have fun plans for it so I think it’s a keeper.  Unless I change my mind tomorrow.  Maybe that’s why I shop at Restoration Hardware so much.  They are really good about returns.  Which makes them really good for indecisive people like me.  :)

I ordered something for the left corner of the room that I’m so excited about!  I’ll show you as soon as it gets here.  I’m dying to figure out something big and tall to use as a backdrop for my mantel – a mirror?  Reclaimed wood?  Not coming up with anything for that yet.  My mantel is hard because it’s so big and deep.  Everything I put on it looks too small and out of scale.

So here are a few pics of my family room in its current, incomplete state…

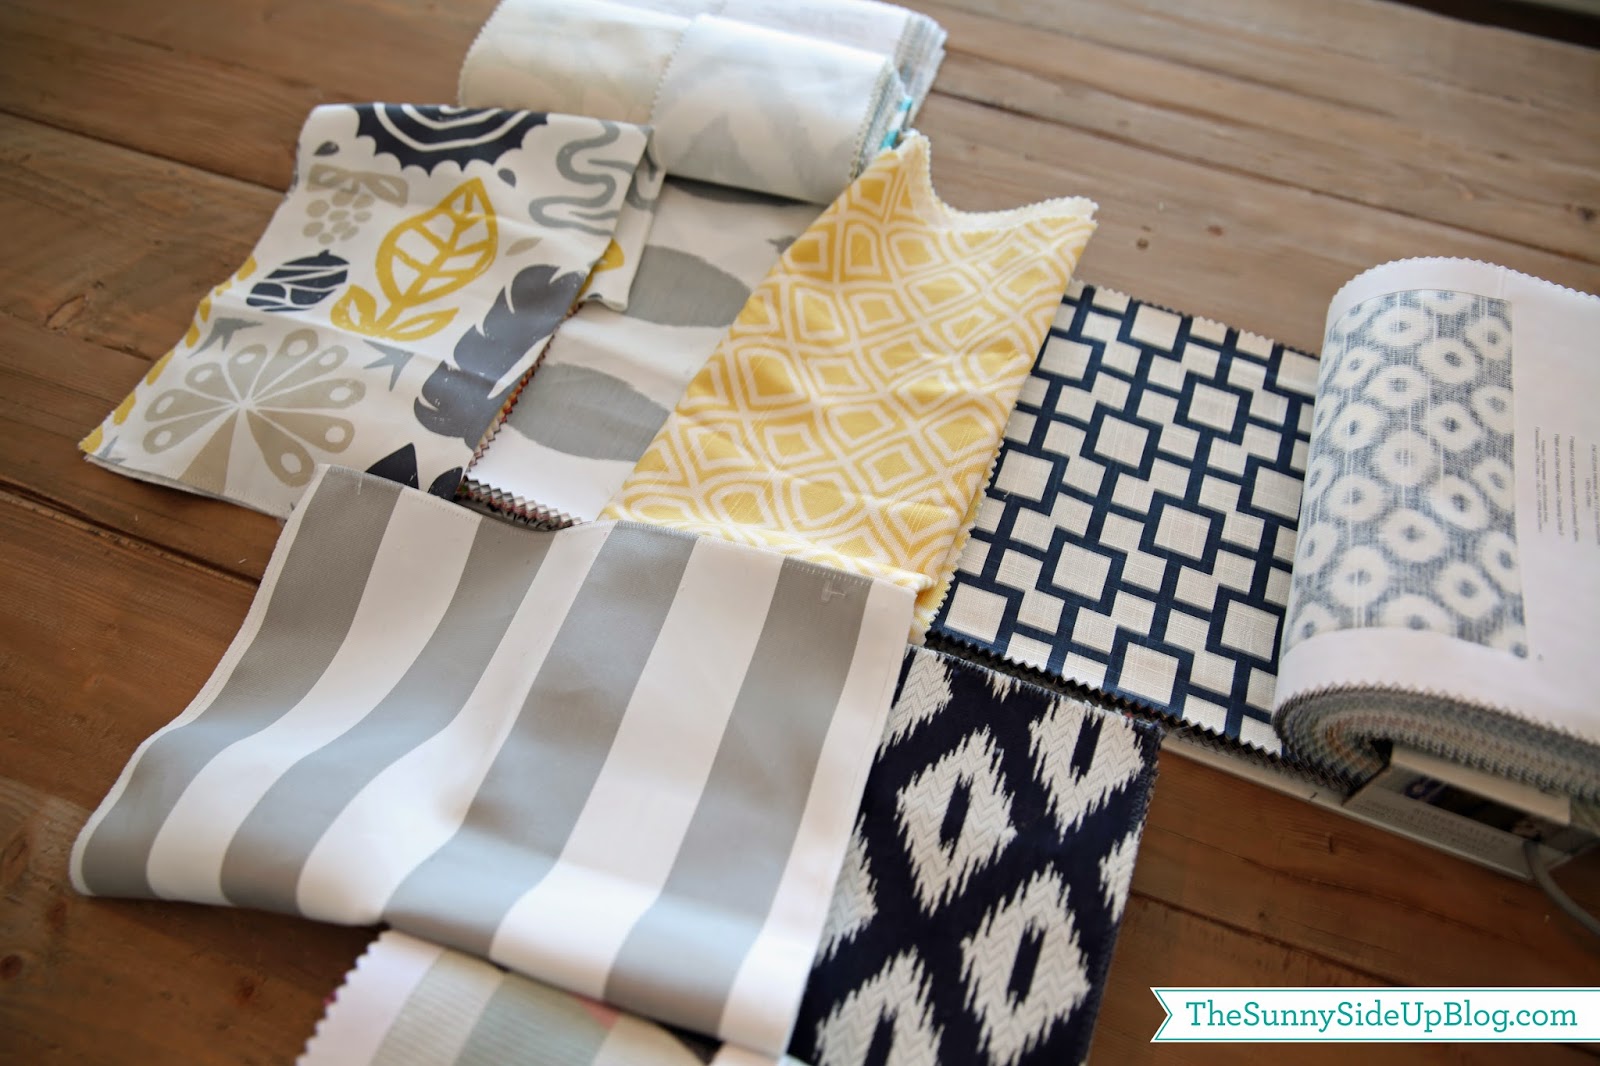
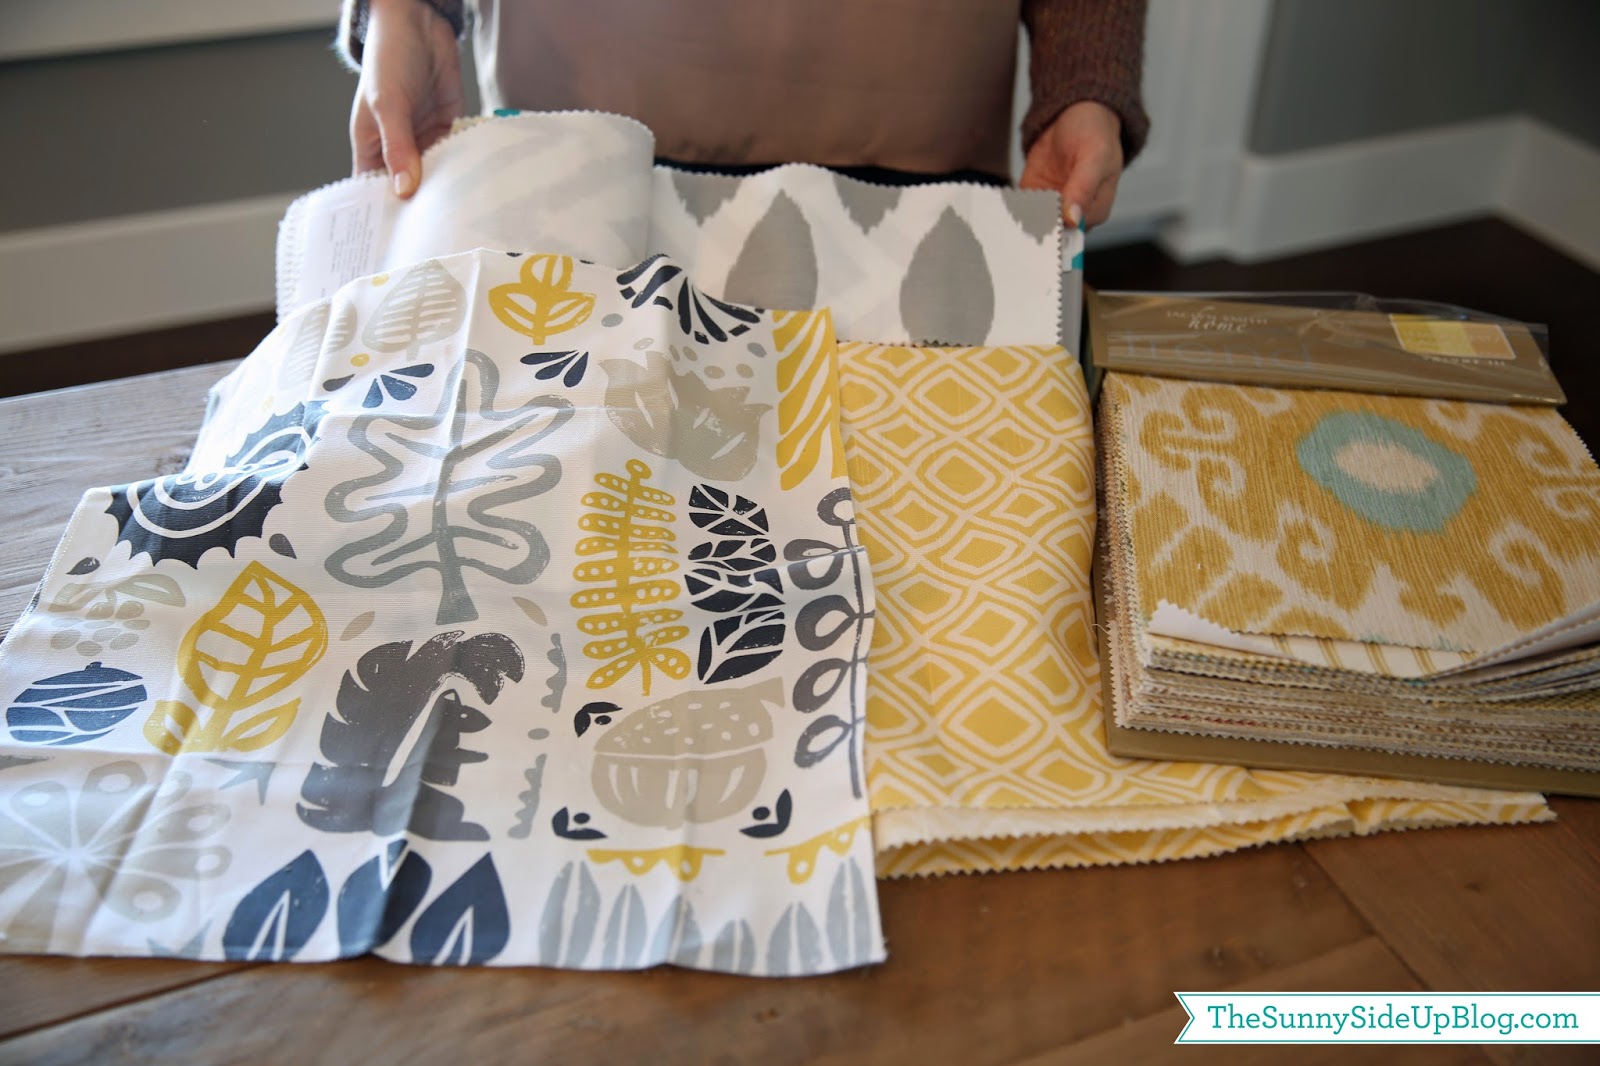
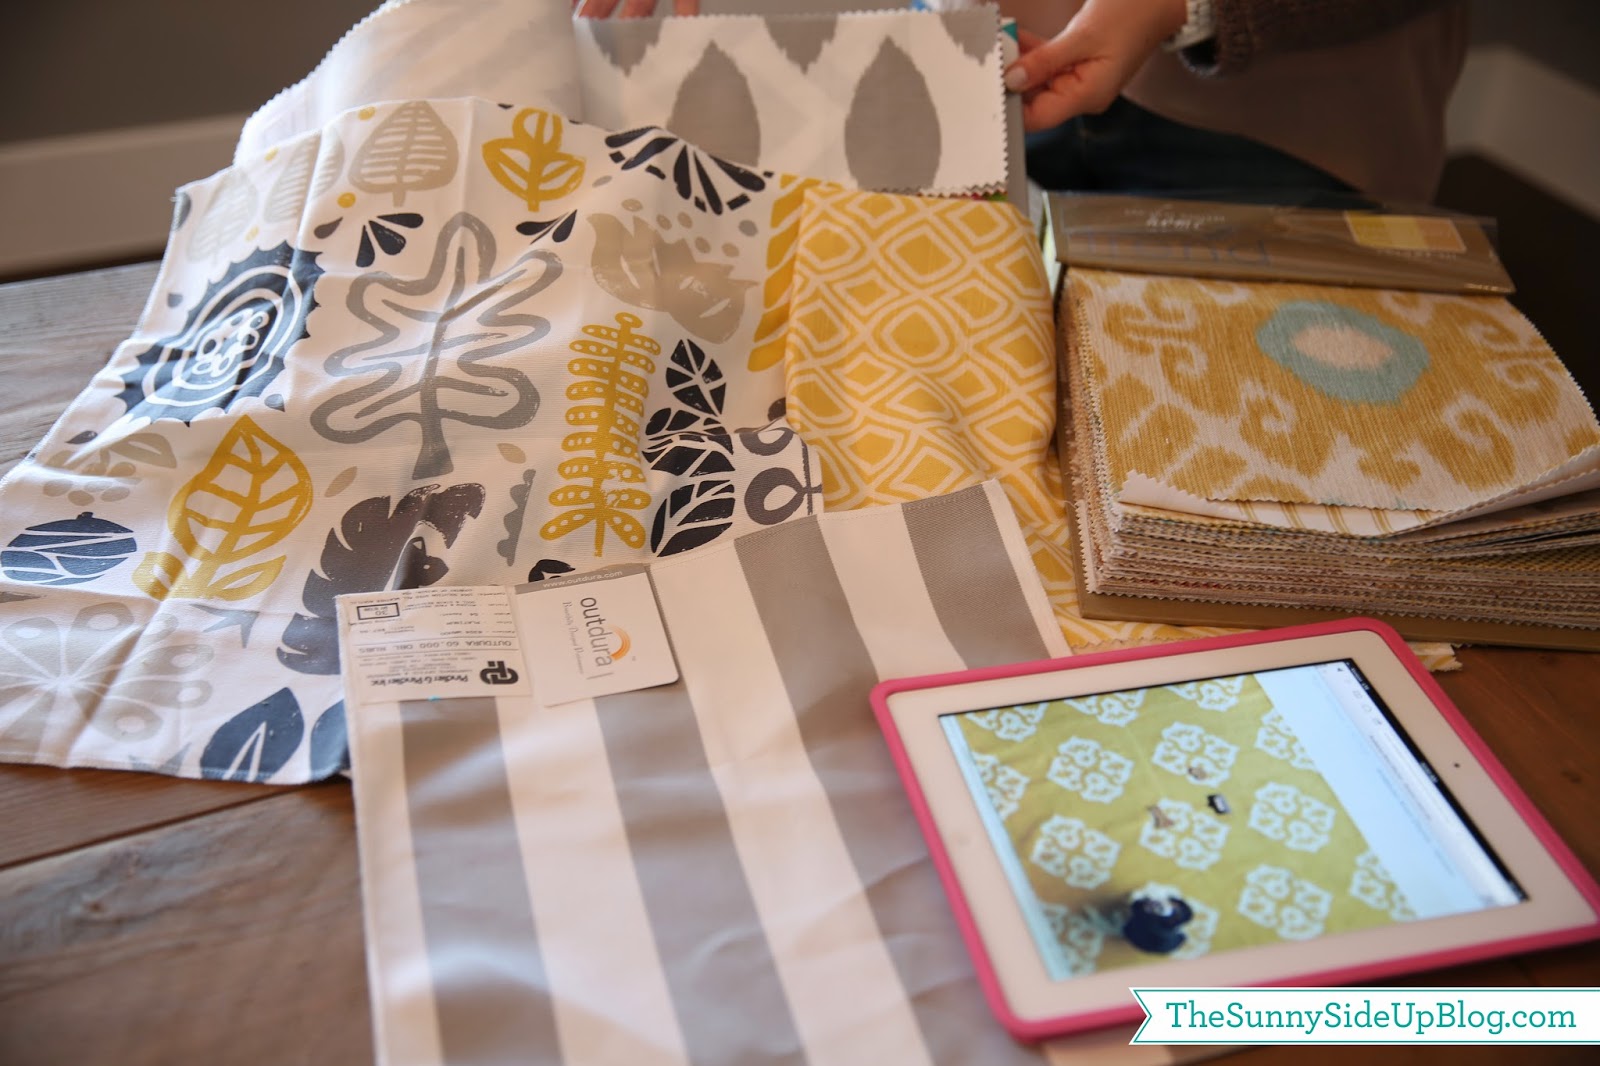
It’s a start!  Progress.  I’ve chosen curtain fabric for the french doors and some of my pillow fabric too but this post is quickly turning into a novel so I’ll share those swatches later.  Would love to hear what you think so far!  Unless you hate it.  And think my coffee table will give you slivers.

;)
Love you mom.

Enjoy your weekend everyone!

xoxo, Erin
Uncategorized

Ski Trip

We’re back!  We’ve been gone by the way.  Sorry for the blog absence.  My kids had last week off of school so we spent the week skiing in Brian Head, Utah.  Home away from home!  I grew up camping and skiing on Brian Head Mountain and it felt so great to be back!  Forgive the overload of  pictures.  I haven’t had time to scrapbook in what feels like a decade so this blog is the only family journaling I’ve got at the moment.  And I don’t want to forget this trip.  The past three years we haven’t traveled much (other than to visit family).  We’ve been busy with babies and building a house and well.. there was that time I almost died.  It’s been eventful to say the least!  But not a lot of travel.  Which we love.  So one of our New Year’s Goals was to have more fun trips in our lives and less babies and building and almost dying.  ;)

Kenny and I have always loved skiing but this was the girls’ first trip.  (I left my little buddy at grandma’s for a week of non-stop fun).  We signed the girls up for ski school in the mornings and then skied with them in the afternoons.

My little ski bunnies!  They were in hot pink pants and the helmets we rented them happened to be bright neon green.  You could see the California girls coming a mile away.  :)

 Of course Kenny’s Charger coat was easy to spot too.  Nope.  Not going to lose any of my family on the mountain.  That Charger coat was quite a conversation piece.  Everywhere we went people either loved us or hated us.  Or just wanted to chat with us about football and San Diego.  We didn’t mean to make a statement.  We just don’t own much in the way of cold weather clothes.  :)

The girls were a little unsure at first.  

 They spent the first day going on “the magic carpet” – a little escalator type machine that takes them to a tiny slope to practice.

They also spent a lot of the first day on the ground.  
 But before long they got the hang of it and were cruising!  
 With their ski school friends making their way down the hill.  

Kenny and I tried to not be helicopter parents (which was so hard for us because we both totally are helicopter parents) so for the most part we stayed away from their class.  But every once in a while we couldn’t resist checking in on them.  We got there the second morning just in time to see them on the lift for the first time.  By themselves!!  My heart almost dropped right out of my chest.  I panicked.  Will they know what to do!!?  To sit back in their seat!!?  To point up their ski tips to get off!!?  To NOT FALL OUT!!?  Kenny kept saying “they’ll be fine.”  And they were.  They were amazing.  Turns out their teacher taught them to sit back in their seat and point their ski tips up and to not fall out.  
Whew.  :)  
 Once I knew the kids were well taken care of I felt free to enjoy the trip.  Kenny and I headed to the more advanced mountains every morning after we dropped the girls off at the bunny hill.  I haven’t skied in years and wondered if I’d remember how!  But it’s like riding a bike.  You pick up right where you left off.  Such an exhilarating feeling flying down the mountain!  Fulfills my need for speed.  :)  When the sun would peek out of the clouds everything was absolutely breathtaking.  I love this sport!  I kept stopping Kenny to say “isn’t this gorgeous!?  Isn’t this fun!?  We are so lucky to be here!”  He finally asked if we could stop having “gratitude moments” and just ski down the hill.  Ha.  So I just had gratitude moments in my head while I was flying down the mountain.  :)  

At the highest point on the mountain.  Brrr!  So cold!
It was hard to smile for this picture because my lips were numb.
San Diego has made us wimps when it comes to the cold.

A few more random pics…

The lodge we stayed at was in walking distance so every day we would ski until the lifts closed at 4:30 and then head straight to the hot tub at the lodge.  They had a heated indoor pool too that the girls loved.  Then we’d toss on some clothes and go to dinner.  One night we had our food delivered to the room.  Kenny caught up on work/e-mails while the girls and I ate and watched Mary Poppins.

I also watched the Olympics each night to pick up some tips for my ski jumps.  ;)

Kole had such a great time with grandma and grandpa that he didn’t want to leave what he called his “Utah Vacation.”

The girls were sad when the trip ended too.  They loved skiing and can’t wait to do it again next year. I feel the same way!
Now we are home and back in the swing of things with laundry piled high and a million things to catch up on.  Bummer!  Always hard to get back in the swing of things after a fun vacation.  So yesterday to ease back into things I decided not to unpack and to style my kitchen shelves instead.  :) Lots of fun progress in the house to post about!  Wonder how long I dare put off that laundry…
:)
xoxo, Erin
Uncategorized

fun finds (and new pillow fabric!)

If you’ve been reading this blog for long you know I love to decorate with lemons.  

We had several fruit trees in our previous house but none of them did as well as our lemon tree. 
 It produced lemons at an insane rate and simply picking the lemons became a regular job at our house.
  
 Lucky for us we always had lots of help with this chore.  
(my girls were so little in this picture!)

 So when we chose trees for the new house, lemon trees were at the top of my list for two reasons.    Number one – I clearly can’t kill them.  Which is huge because I’m about as good at landscaping as I am cooking.  And number two – I still love to decorate with them!

I found this cool wooden bowl (would you call this a bowl?) at Home Goods and knew it would be perfect to hold lemons on my counter.  

 I’ve been trying to drink lemon water more often (so many health benefits!) so it’s handy to have them out on the counter like this.

I also love the way the wood warms up my kitchen a bit.  I’m planning to add a lot more wood throughout my house.  I haven’t really started decorating my kitchen yet.  A few things on the open shelves, but I’m taking my time waiting to find things I really love and find useful.

My new wooden lemon holder is fun decor and so practical for me with my overflowing supply of lemons.  A keeper for sure.  
I guess I do have one more kitchen counter accessory I didn’t mention.  
Soothing color palate don’t you think?  :)

Also at Home Goods I found these fun Ikat organizers.  I loved the pattern and color so much I picked up six of them!  Such a steal at 4 bucks each.  I’m not sure what drawers they are going in yet, but I’m sure they’ll find a happy home in no time.

Oh!  And I decided to bring some navy into my formal dining room!  I’m adding pillows in the two fabrics on the right so this picture shows the final bench/chair/pillow combination.  Can’t wait to see them in the room with the new yellow rug.   :)  
Anyone else a fan of Home Goods?  I find so many random cool, inexpensive things for my home in that store! 
xoxo, Erin
Valentines Day

Our Valentine Cards.. better late than never

So you know how most bloggers do fun things for the holidays and they post about them way in advance of said holiday so that everyone reading can benefit from their ideas?  I’ve learned I’m not one of those bloggers.  Admitting it is the first step.  :)  We were still in assembly mode the night before Valentine’s Day and I’m just grateful I had enough sanity left to snap pictures.  Earlier that day I tried making Kenny some cookies to go with his Valentine’s Day gift (the recipe was from a friend – one she said couldn’t possibly be messed up).  And I totally messed them up.  It was a cake mix recipe and I followed the back of the cake box mid way through instead of following the cookie recipe and had to just make a cake instead.  Kenny ate some and said “you make a pretty good cake babe.. when you’re trying to make cookies.”  Nice.  It just wasn’t my year!  So here’s what we did for class Valentine’s because I took the pictures and well… there’s always next February.  :)  
I found these cute, inexpensive little buckets on Amazon and decided they would be perfect Valentine’s for Kole’s pre-school buddies.  

I had seen variations of shovels with the “I DIG YOU” theme on-line but decided to make it our own by using this fun picture of my little man swimming.  I just added some text to the picture in photoshop and ordered wallet size pics.  Took 10 minutes!

 I attached his picture to the buckets with some red and white baker’s twine. 
So simple and fun!    

I debated putting some Valentine candy in them but decided not to since the kids are overloaded with candy and I wanted the fun digging tools to stand out.  Love all of the bright colors.  
They make me excited for summer!
Addison is my fishy cracker connoisseur so this simple Valentine was perfect for her.  I typed the words and punched out the circles with circle punches and then she assembled them all.  So nice having some help!  When the girls were little I remember Valentines taking HOURS.  Just having them sign their names was a feat.  Now my girls are old enough to make their own Valentines and I’ve gotten wiser and just type the toddlers.  We learn as we go moms!  

 Can you guess who chose these little cards?  El’s had to be pandas so it was tiny prints to the rescue.

She spent so much time writing the sweetest little notes to her classmates in each one. 
Then she was mad when some of the boys didn’t even take the time to read them.  “They just went for the candy!” she told me shaking her head in disbelief.  We had a nice talk then and there about some of the idiosyncrasies of boys and how they don’t change much as they get older.  ;)  

Teachers got chocolates with hand written notes.  
Kole has a lot of teachers so we bought a lot of chocolates.  
Carmel is my favorite so I assume everyone else feels the same.  :)
And speaking of chocolate…now that Valentine’s Day is officially over guess what is already popping up in stores?

This is the time of year when my diet takes a major dive.  
Happy late Valentine’s Day everyone!
Glad we have a year until the next one.
It will take me that long to learn how to make those darn cookies.     
:)
xoxo, Erin
Home Decor

Formal Dining Room – decor plan!

Alright friends.  Let’s talk decor!  Finally.  :)  A few days ago I shared our new formal dining room with you all.  A nice blank slate!  Here are a few details about the room.
The lights are from Art Craft Lighting and you can find them here.  I am so in love with these fixtures!  I always think modern elegance when I see them.  But maybe that’s just me.  I put a similar fixture and matching sconces in Kenny’s office because I loved how they looked in the dining room so much.  Really these pictures do NOT do them justice.  They give off such a nice glow for dining.  They make me actually want to use this room!  Which means I have to cook.  Or call for take-out.  Something modern and elegant?  Anything other than my typical cheese tortillas will do.  :)
The paint for this room is darker than the paint I used throughout the main body of my house.  The walls of the dining room are painted “Wavelength” by Frazee.  The inside of the cabinets are one shade darker.  Another Frazee color called “Elf.”

A few of you asked about the size of my baseboards.  I made them 7 inches tall which was as high as I could go without hitting plug outlets.  I think my builder thought I was a little strange to want them so high and so plain, but I love how they turned out.  Some of your other house related questions I’ll answer in a Q & A post.  I’m anxious to show you my decorating plans for this room!
First up – our new table!  I took a pic with the lights off…
and one with the lights on.  :)  Oh for the love of all things farmhouse!  I have adored this table for a LONG time.  The second it was decided that we would be putting a formal dining room in the house I knew exactly what style of table I wanted!
The table is from Restoration Hardware and aside from the rustic farmhouse look, I adore the simplicity of it.

These pictures show its true color.  It’s light but has subtle grey undertones so I think it works well in this space.  The wide planks are my favorite.  With all of their perfect imperfections.  :)

These are the chairs I fell in love with that fit the style of the table.  This set is actually from Aidan Gray and I was all set to order them.  (Love the metal back!)
But then I realized they sell a set at Restoration that match the table and are $200 cheaper per chair!  They don’t have the metal back which I wish they did, but I don’t think the back is worth paying so much more for.  They also don’t come with a padded seat, but Restoration sells pads for them for not too much so I think I’ll buy those.
Here is the Restoration picture of the table and chairs with the pads.  I’m only buying a few of these chairs because I don’t want the chairs to all match.  I’m looking for something different to go on the two ends of the table.  And on the side of the table in front of the window I’m having a custom bench made.  Fun!

This is an inspiration pic I have always loved.  See the similar chairs on one side with the grey bench on the other side?  Love that look.

Here is another inspiration pic I love with the three chairs similar to the ones I’m going to order and two different chairs on the sides.

Ok.  Moving on to the rug!  Thank you again so much for your help with my rug decision!  I loved hearing all of your feedback!  You all brought up so many good points.
Here is the one I chose (for now anyway!):

I LOVED the octagon rug too (that was my initial first choice) but I was a little worried about how much of it was white for under a table.  Even though it’s not an every day table, it only takes one spill.    A lot of you pointed out the same thing.  The rug above seemed a little more spill friendly.  Maybe it was the dog and bone in the picture that gave me that feeling?  :)  I decided to order it and see how it looks and then figured if I don’t love it I can return it and get the octagon rug.

But I think I love it!  It’s so happy!!

I took these pics right after I laid it down.  What do you think?  It’s a little Bohemian looking.  But I think I love that too!  I don’t know why, but I always pictured a yellow rug in this room.  Probably because yellow is just so happy!!  Did I already say that?  Is it making you happy too!?  I can’t believe how much it lightened the space.

Ok.  Here’s what I’m picturing for this space.  Since this room will only be used once in a while I’m excited for it to be a room that actually stays looking nice.  You know – no pillows tossed on the floor, backpacks tossed on the table, train tracks under the chairs.  Well.  There will probably still be train tracks under the chairs, but you get the picture.  So I’m thinking about an upholstered bench with three pillows on it.  My designer/friend is helping me with it.  Here are some of the fabric options I’m considering…

The fabric in the back with the grey ovals is what I’m leaning towards for the bench.  I was originally going to do a plain grey tufted bench like the inspiration picture but I think it will be too much grey with the grey paint in the room.  I don’t want to go too crazy with color on the bench so that I can always mix up the pillows.  I think a white/grey pattern will be good for me and my constant need to re-arrange/change things.  The three fabrics in front of my bench fabric are some I’m considering for the pillows.

I also love the grey striped pattern to put on an extra chair (I’m ordering two extra chairs to set in the corners of the room for when we have to extend the table to fit larger groups).  The fabric on the far left is so fun.  I like that it also has black which will tie in with the light fixtures and hardware on the built-ins.  The only thing I’m debating is bringing in one more color for the pillows and swapping it for one of these.  An aqua pillow?  Or navy?  These fabrics are only for a few pillows so I’ll also be able to bring in other colors with decor in the built-ins and whatever I end up doing on the walls.  Regardless, I think the room is off to a good start!

Our house is still so empty that any start is a good start.  :)

Here are some other random shots I took of this room before the rug came…

Here you can see where this room is located.  Just down the hall from our stairs and my office.

And here is a shot from the other side of the dining room by the window.  You can see how it is also located across from my butler’s pantry/kitchen.

So that’s it for dining room decor so far!  I’ll post updates as the room progresses.  Fun!  My first decorating post in the new house!  First of many I’m sure.  :)

xoxo, Erin
Home Decor

Formal Dining Room

Sharing my formal dining room today!  I’m so excited about this room.  Which is funny to me since the last thing I wanted was a formal dining room.  When we sat down with our architect and started discussing our floor plan layout I told him that I didn’t want a formal living room or a formal dining room.  We aren’t very formal people, I’m far from a chef, and I felt like a formal dining room especially would be wasted space.  But it turned out that a formal dining room was important to my husband so he can entertain for work, and to my architect for re-sale in our area so I was quickly vetoed.  My architect then set up our plans so that you walked into our formal dining room from the front entry door.  I didn’t love that.  So we ended up putting in a formal living room too – mostly just as a pretty room with views of the yard when you walk in the front door (I’ll share that room at some point too).  The formal dining room is around the corner and across the hall from the butlers pantry/kitchen.  Now I love the two “formal” rooms and for once am glad that I was over ruled.  :)
Here are a few pics of the space…

It’s a fun room with a large window planked by built-in cabinets (this big window makes it really hard to photograph head on!).  I have chrome hardware in most of my house, but decided to use black (oil rubbed bronze) hardware in this room to match the light fixtures.  Love these light fixtures!  They don’t show up great in photographs but are so beautiful in person.  I will share the link/source soon!  I’m sure you’re not surprised they are clear glass.  I love that look and carried it throughout a lot of my house.

 Planks on the ceiling.  I’m sure you’re not surprised by that either.  :)
All of the molding in my house I kept really simple and wide.  Straight lines – inset panels.
My favorite look.   This is the molding casing the opening to the room.
I did the same thing with my crown molding and baseboards.  Simple and wide.
Like most of the rooms in the house we put plantation shutters on the windows.
Here is a close up of one of the built-ins.  (And a peek of my new table!)
 I painted the inside of these shelves a deep grey (darker than the paint on the wall).

I didn’t want glass shelves, I wanted white shelves, but I wanted the light in the built-ins to filter through each shelf.  We finally decided on shelves with glass in the middle of them.  I was so happy the day we came up with this solution!

It gave me the look I wanted but still lets the light shine through the shelves.  

You might have noticed that on the left side of the room, the built-in cabinet touches the wall.

And on the right side of the room, we have extra wall space with two small puck lights above.  Originally the plan was to put one big built-in on the right side of this room, but I was having a hard time figuring out how I wanted it to look and I kept thinking it might be nice to just have a big buffet table in this space to spread out food when we are serving/entertaining.  So I ultimately decided to scratch the large built-in and add two smaller built-ins on the sides of the window.  I’m going to put furniture (some type of buffet table) on the right.

So the room looks a little off centered right now, but it will all work once I get furniture in the space.
At least I hope that’s the case.  :)
I’ve been working on decorating this space (I’ve had a vision for it since we broke ground!)  so
I’ll share my new table, rug (yes I chose one!), and decorating plans for the room in my next post.  Hope it all comes together ok!  If you have any source questions about this room feel free to ask in the comments and I’ll answer those in my next post too.
And then I want to invite you all over for dinner.
Pot luck anyone?
:)
xoxo, Erin
Organization

3 steps for getting your inbox under control

My friends.  I have a confession to make.  While my home is an area I keep organized and for the most part running smoothly, my inbox has been quite another story.  I spent some time a few weeks ago getting my inbox under control.  It was under control at one point in time but somewhere along the way while we were building our house, control was lost and I’ve been swimming in a sea of e-mail madness ever since.  Sometimes my inbox overwhelmed me so much I just pretended it didn’t exist for a few days.  Wouldn’t recommend that little trick!  :)  But I do have a few tricks I would recommend.  If you too have lost control of your inbox here are 3 things that I did to get mine back under control.  And now I’m determined to keep it that way!

1)  CLEAR OUT THE CLUTTER.  The first thing I did was to eliminate unnecessary e-mails.  Some e-mails we don’t want we can’t do much about.  :)  But there are a lot of unnecessary promotional e-mails that we can get rid of.  Clear out any e-mail you don’t want to receive that is cluttering up your inbox by unsubscribing.  To do this, scroll to the bottom of the e-mail and it will say something like this in fine print: “if you prefer not to receive promotional emails from us, unsubscribe here.”  Click that button and never look back!  You have to stay on top of eliminating e-mails like that from stores or before you know it your inbox will be cluttered with junk mail.  I only kept e-mail subscriptions to a few stores that I really love and shop at often.

2) SET UP FOLDERS THAT WORK FOR YOU.  You all know of my love for categorizing.  You also know that I love a good folder system.  Just like with organizing your home – everything has a place!  It’s how I organize my pictures on my computer (folders inside of folders) and it is crucial to keeping your inbox organized as well.  This step takes a little time initially, but will save you so much time in the long run.  The important thing to remember when you are setting up your e-mail folders is to do what works best for you and your specific e-mail needs.

I recognize that your folders will be completely different from mine, but I’m going to share how I organized my folders to give you some ideas.

First folder:  BLOG
Folders inside of BLOG:
     – to answer (questions that need a longer response when I have more time)
     – Q & A (questions that have popped up more than once that would be good to answer in a post)
     – comments (I save a lot of your sweet comments!  They mean so much to me.)
     – design/programs (other blog related e-mails I want to save)

Second folder:  NEW HOUSE
     – decorating (this folder is a busy and fun one these days!)
     – cabinets (all of our cabinet/built-in sketches)
     – new house e-mails (HUGE folder full of e-mails from the past two years)
     – house specifics (details like where things were ordered from – so I can tell you when you ask!)  :)
     – pics (inspiration pics I emailed our builder/architect that I want to keep

Those two are the large folders for me where a big chuck of my e-mails come from.  These are the rest of my folders:

El, Ad, Kole (I have a separate folder for each of my three kids.  I put everything in these from birthday invites to school forms to friend info. – anything related to that child that I want to hang on to.)

Young Women (e-mails relating to what I’m helping with in my church right now)

Coupons (this folder is working so well for me!  Any coupon I get from a store that I think I’ll use I put in this folder.  Then when I get to the store I pull out my cell phone, open the e-mail folder, click on the coupon I received and show it to the clerk.  Done!  No more printing coupons!  And I can locate them so fast.  Love it!)

New recipes (a place to stash any recipes I receive through e-mail.  Until I use them.  Which will most likely be in the very distant future.  But when I’m ready I’ll know where they are.)  :)

New addresses (a place to stash “our address changed” e-mails so when it’s time to mail out Christmas cards they are all in one place and easy to find)

Pictures (pics I get through e-mail that I want to save)
   
Like I said, obviously your folders will look different than mine.  Take a minute to go through your e-mails and see what the majority of them are about and how you can categorize them in an orderly way that makes sense for you.

3) READ, ACT, AND DELETE!  Deal with your e-mails immediately and try to keep your inbox as empty as possible.  Now that you have your folder system in place it is so easy to take care of each e-mail as soon as you get it.  Is it a question you can quickly answer?   A date you can instantly add to your calendar?  Something you can file away in one of your folders to save that doesn’t need immediate action?  Something important you could quickly jot down on your to-do list?  If at all possible, take care of the e-mail as soon as you read it and then DELETE it.  The only messages that get left in my inbox are messages I need to respond to soon and just have to wait until a more convenient time.  Then when I have a minute (usually after kids are in bed) I can go through them and take care of each one.

Following these three steps has made a HUGE difference for me! I feel completely on top of my inbox (LOVE that it is often EMPTY!) and I can find any e-mail I need in seconds.

Most importantly, I no longer feel the need to periodically pretend my inbox doesn’t exist.  

:)
What about you?  Any tried and true tips that have helped you stay on top of your e-mails?

xoxo, Erin
Parenting

Game Day Snacks (6 layer refried bean dip)

Superbowl is over and what a bummer of a game!  For Bronco fans anyway.  Technically Charger fans in this house but for today’s game we figured if you can’t beat em’ – join em’.  Except when they play like they just did.  Bad call on our part!  Oh well.  We had a fun afternoon anyway.  My parents were in our area with a group of friends/co-workers and they all came to our house for the game.  It was our first official grown up party in the new house!  And I should have taken more pics of all of us because we all looked so cute in our game day attire!  Even though mine was a Charger jersey.  Football is football, right?  (Hopefully my husband won’t read this.)  I did snap pics of a couple of appetizers I made before our guests arrived…

I found this fun football shaped cheese and cracker platter on pinterest and couldn’t wait to make it myself.  So easy and fun for game day!  Have you seen this before?  Darling.  Did I just call a football snack darling?  Again hoping my husband doesn’t read this.

I don’t know that mine turned out quite as good as the inspiration pic, but it resembled a football and people ate it so I’ll consider it a success.  :)

I also made this 6 layer refried bean dip.  I know there are many 7 layer bean dip recipes and they are all similar, but the way Kenny’s mom makes it has always been my favorite.  So I thought I’d share her recipe with you today.  You know if it’s something I can make it’s SUPER simple.  And seriously, this never lasts long.  It’s so delicious!  Set this by a bowl of tortilla chips and watch it disappear!

{6 LAYER REFRIED BEAN DIP}

1st layer:    Refried Beans
2nd layer:  Mix together 1 T lemon juice, 1 to 3 avocados, 1/2 t salt, 1/4 t pepper, 1 cup sour cream,
1-2 T taco seasoning mix
3rd layer:  1 cup chopped onions
4th layer:  1 cup chopped tomatoes
5th layer:  1 cup chopped olives – I added more than that – I like olives.  :)
6th layer:  1 to 2 cups shredded cheese
Superbowl is over but these treats were such a hit tonight they may just be popping up again soon.  El asked if I can create a panda head with cheese and crackers next time.  
I’m up for the challenge.  Should be interesting.
:)

xoxo, Erin

Shop my instagram

View All Posts